15 Budget-Friendly DIY Projects to Refresh Your Home in a Weekend
15 Budget-Friendly DIY Projects to Refresh Your Home in a Weekend
Refreshing your home doesn't have to break the bank or consume endless time. With a bit of creativity and some DIY spirit, you can transform your living space over a weekend without spending a fortune. This article presents 15 budget-friendly DIY projects that are easy to tackle, using affordable materials and simple techniques. Each project is designed to add style, functionality, or a personal touch to your home, ensuring a quick and satisfying refresh. Whether you're a seasoned DIYer or a beginner, these ideas will inspire you to roll up your sleeves and get started. Let's dive into these practical projects that promise to revitalize your home in just a couple of days.
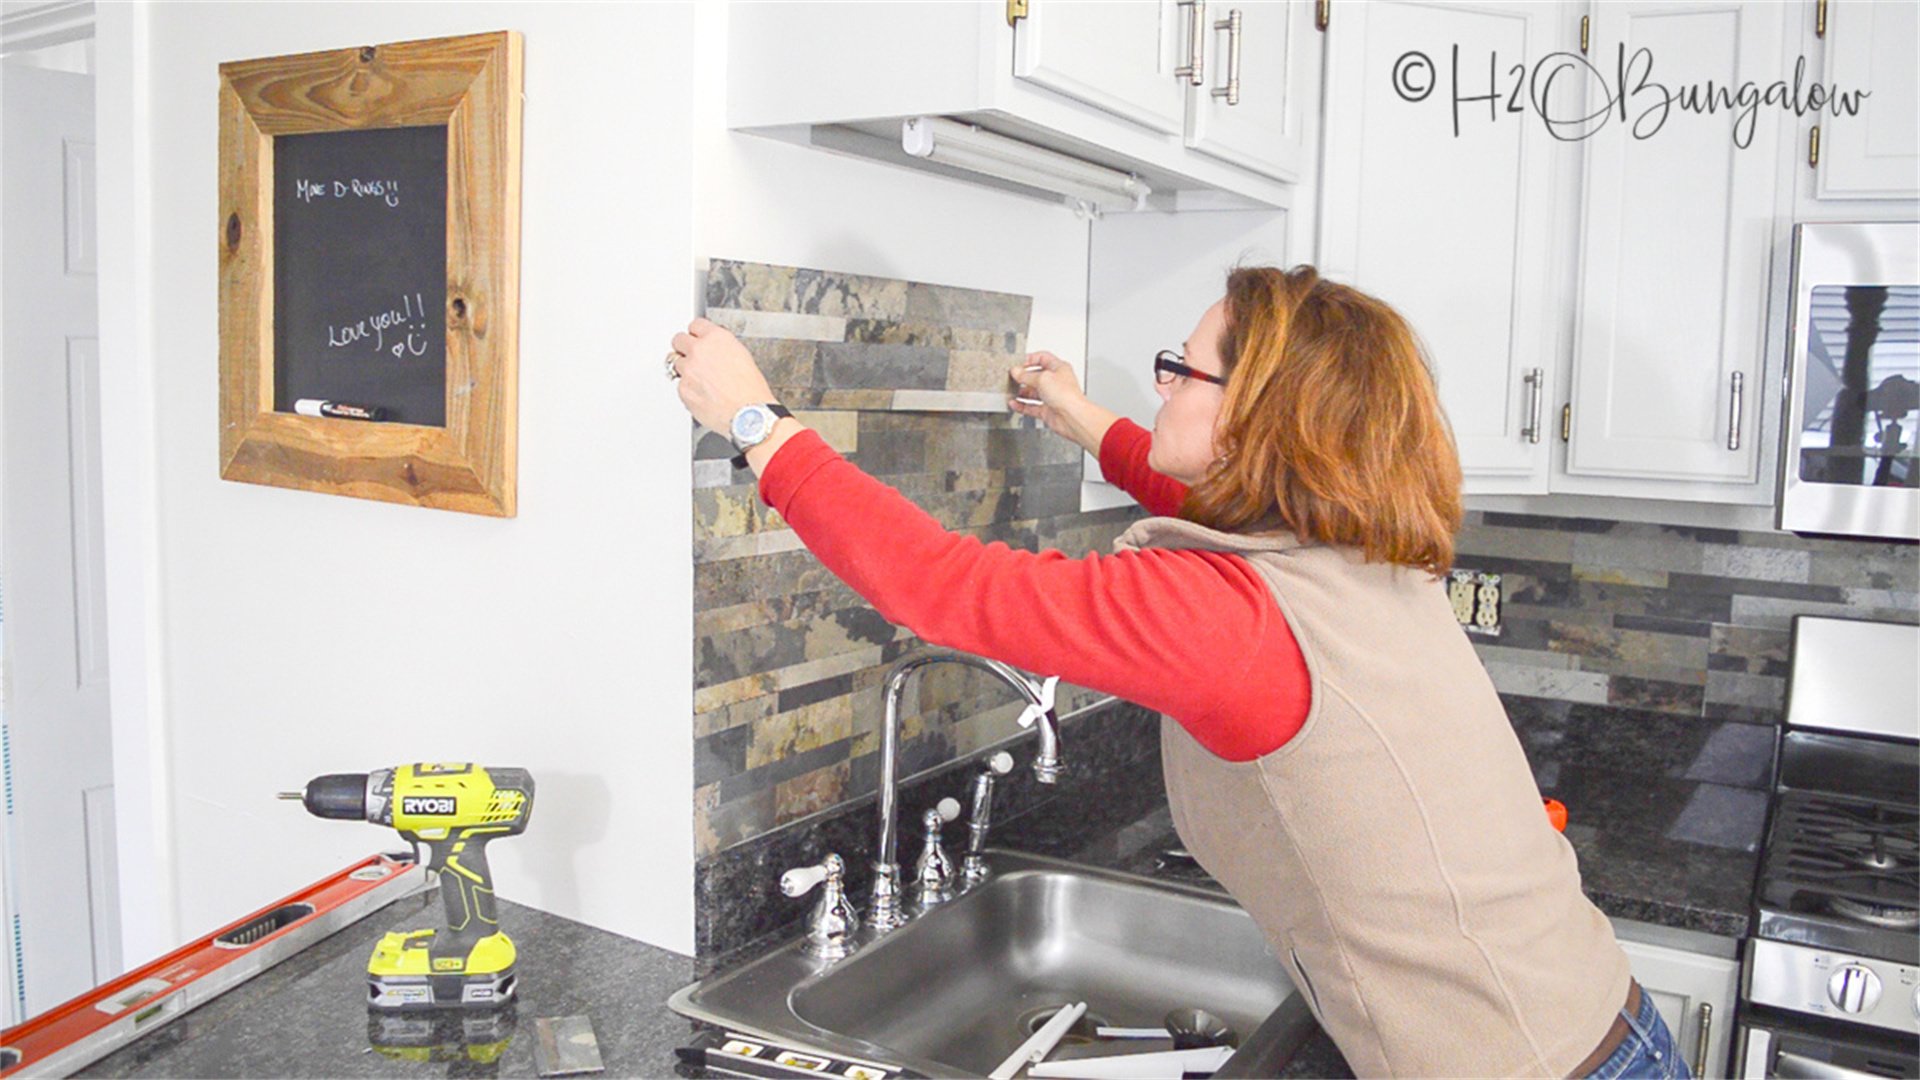
🧱 Project 1: DIY Peel-and-Stick Backsplash for the Kitchen
Overview
A peel-and-stick backsplash mimics the look of traditional tiles but requires no mortar or grout. It's an affordable way to add color and pattern to your kitchen walls.
Materials Needed
- Peel-and-stick backsplash tiles (available at home improvement stores)
- Measuring tape
- Utility knife or scissors
- Level
- Cleaning supplies (to ensure the wall is clean before application)
Step-by-Step Implementation
- Prepare the Wall: Clean the wall surface thoroughly to remove grease and dirt. Allow it to dry completely.
- Measure and Plan: Measure the area where you want to install the backsplash. Mark the center point and plan the layout to avoid awkward cuts.
- Apply the Tiles: Starting from the center, peel off the backing and press the tiles firmly onto the wall. Use a level to ensure they are straight.
- Cut Tiles as Needed: For edges or around outlets, use a utility knife to trim the tiles to fit.
- Smooth Out Bubbles: Use a roller or your hands to smooth out any air bubbles for a seamless look.
Advantages and Disadvantages
Advantages:
- Cost-effective (under $50 for most kitchens)
- Easy to install without professional help
- Removable without damaging walls
- Available in various designs
Disadvantages:
- May not be as durable as real tiles
- Can be prone to peeling in humid environments
- Might not add significant resale value
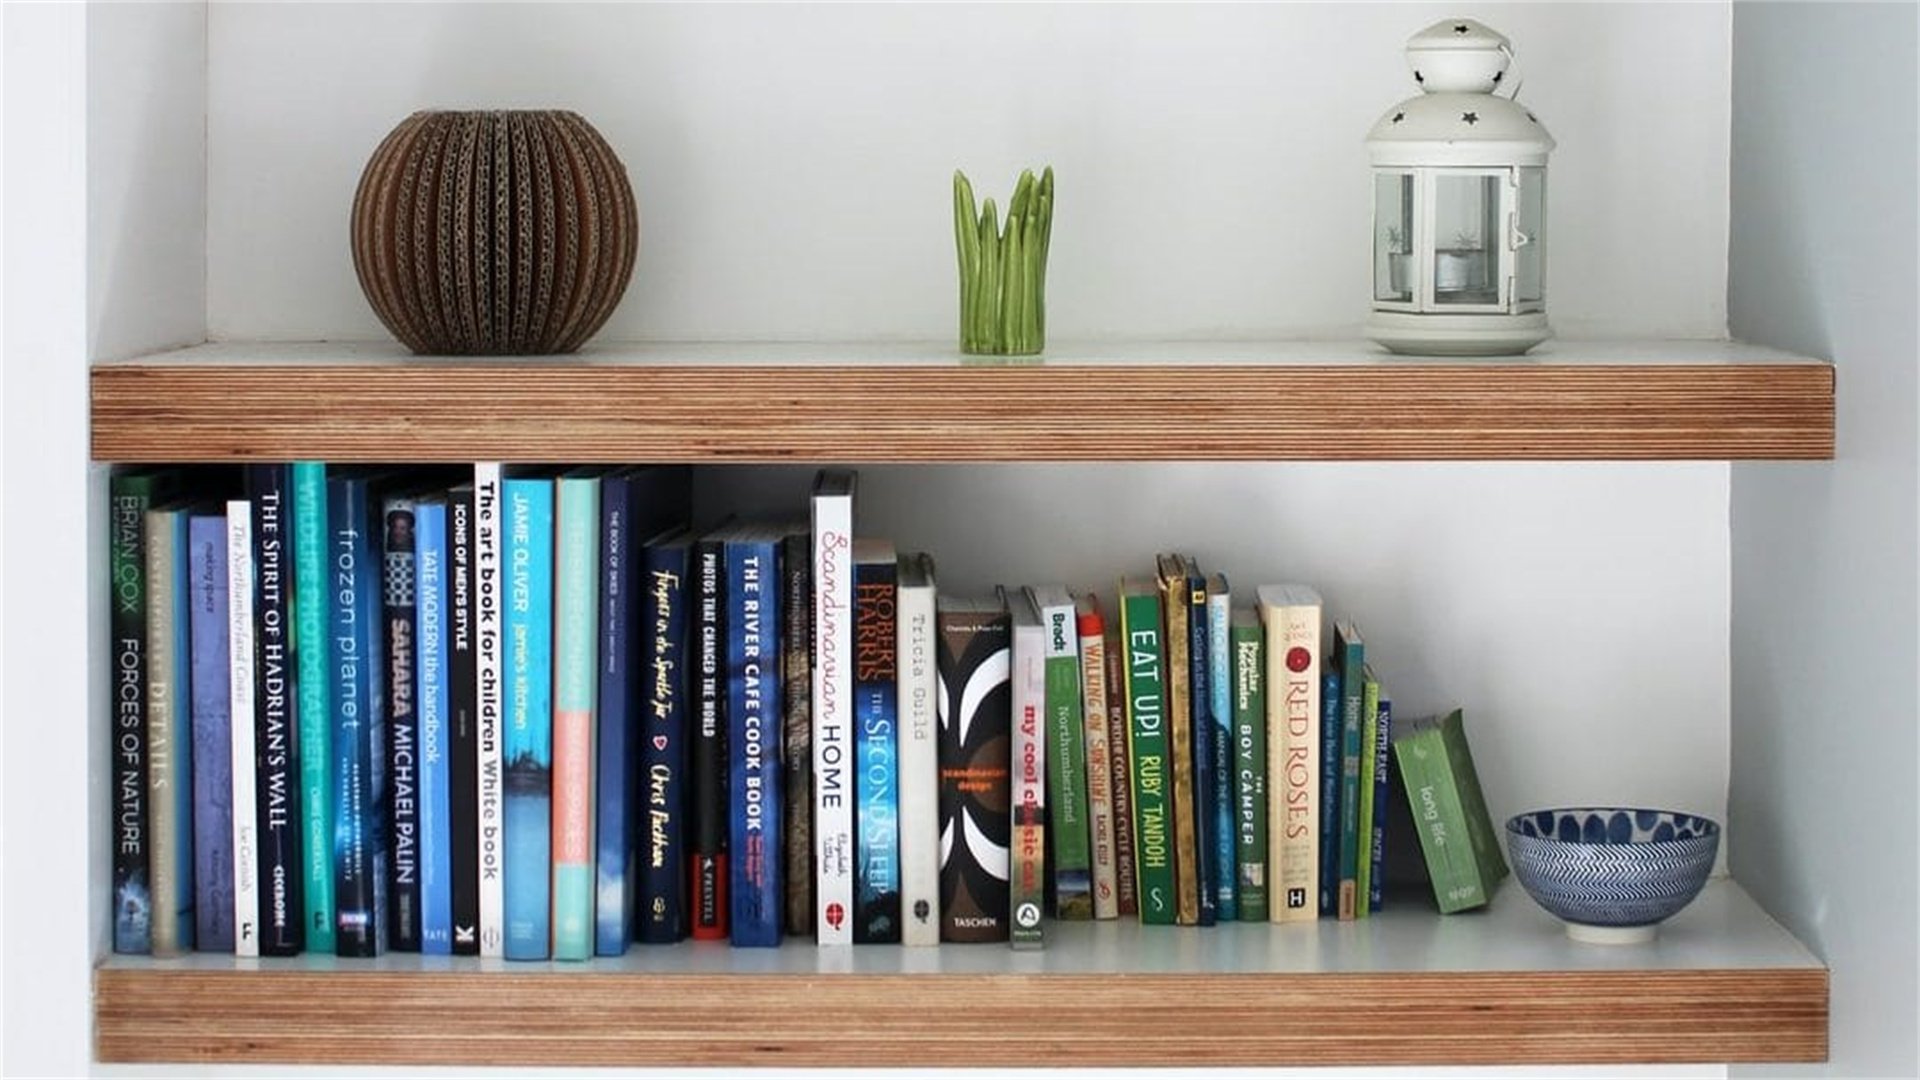
📚 Project 2: DIY Floating Shelves for Living Room Storage
Overview
These shelves appear to "float" on the wall because they lack visible brackets. They're ideal for displaying books, plants, or decor items.
Materials Needed
- Wood boards (pine or plywood, cut to desired size)
- Wall anchors and screws
- Drill and drill bits
- Sandpaper and wood stain or paint
- Level and pencil
Step-by-Step Implementation
- Prepare the Shelves: Sand the wood boards until smooth. Apply stain or paint and let dry completely.
- Locate Studs: Use a stud finder to locate wall studs for secure mounting. Mark the positions with a pencil.
- Install Brackets: For floating shelves, use hidden brackets or create a recessed mount. Drill holes into the wall and attach the brackets securely.
- Attach Shelves: Slide the shelves onto the brackets or screw them from the inside for a flush fit. Use a level to ensure they are straight.
- Style the Shelves: Once installed, arrange items on the shelves to create an attractive display.
Advantages and Disadvantages
Advantages:
- Maximizes vertical space
- Customizable in size and finish
- Adds modern aesthetic
- Can be built for under $30 per shelf
Disadvantages:
- Requires basic woodworking skills
- May need wall repairs if removed
- Weight capacity depends on installation
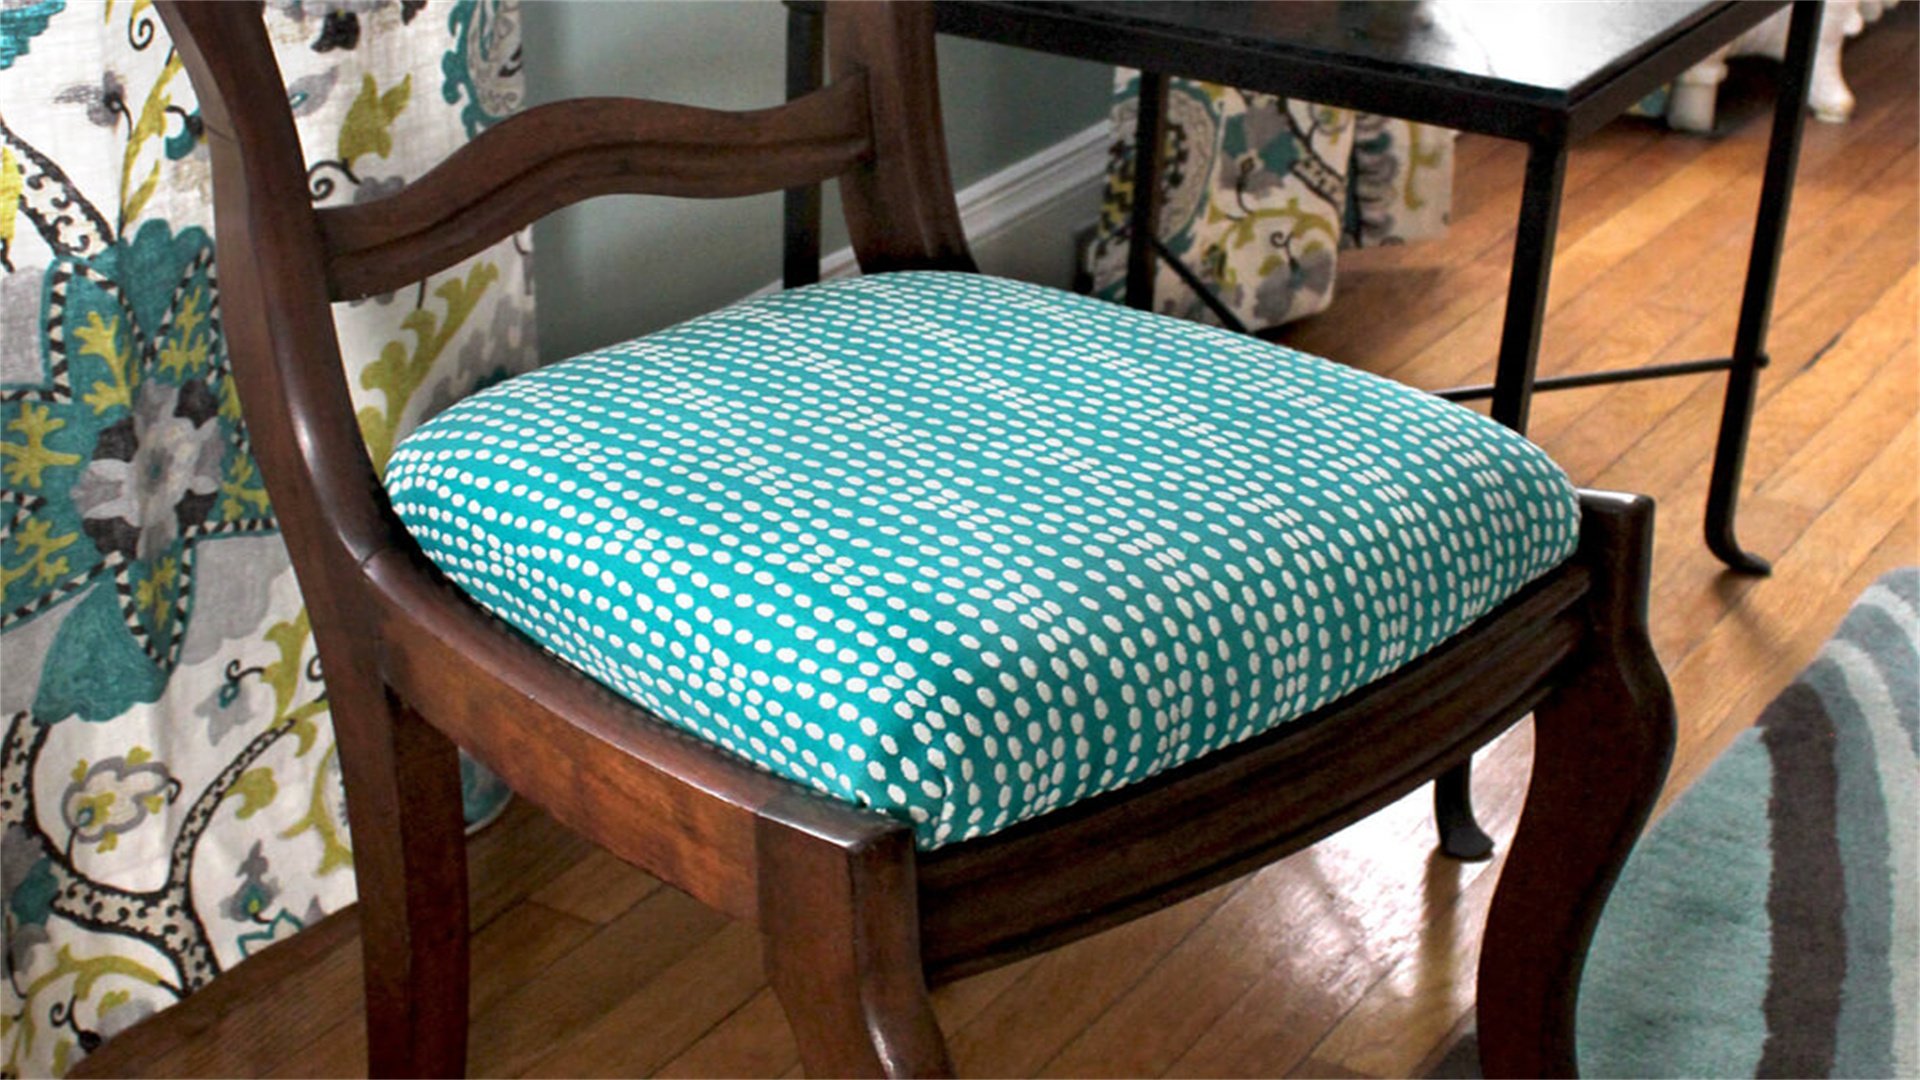
🪑 Project 3: DIY Reupholstered Dining Chairs
Overview
Reupholstering chair seats involves replacing the existing fabric with a new pattern or color, giving your dining set a fresh look.
Materials Needed
- Fabric of your choice (durable like cotton or linen)
- Staple gun and staples
- Screwdriver (to remove seats)
- Scissors and measuring tape
- Foam padding (optional, for added comfort)
Step-by-Step Implementation
- Remove the Seats: Turn the chairs upside down and unscrew the seats from the frames.
- Remove Old Fabric: Use a staple remover or pliers to take off the old fabric and padding.
- Cut New Fabric: Place the seat on the new fabric and cut around it, leaving about 2-3 inches of excess on all sides.
- Attach New Fabric: Center the seat on the fabric, pull the fabric taut over the edges, and staple it in place. Start from the center of each side and work outward.
- Reattach Seats: Once stapled, trim excess fabric and screw the seats back onto the chair frames.
Advantages and Disadvantages
Advantages:
- Inexpensive (fabric costs around $10-$20 per chair)
- Allows for personalization
- Extends furniture life
- Can be completed in a few hours
Disadvantages:
- Requires a staple gun
- Fabric may wear over time
- Mistakes in stapling can be visible
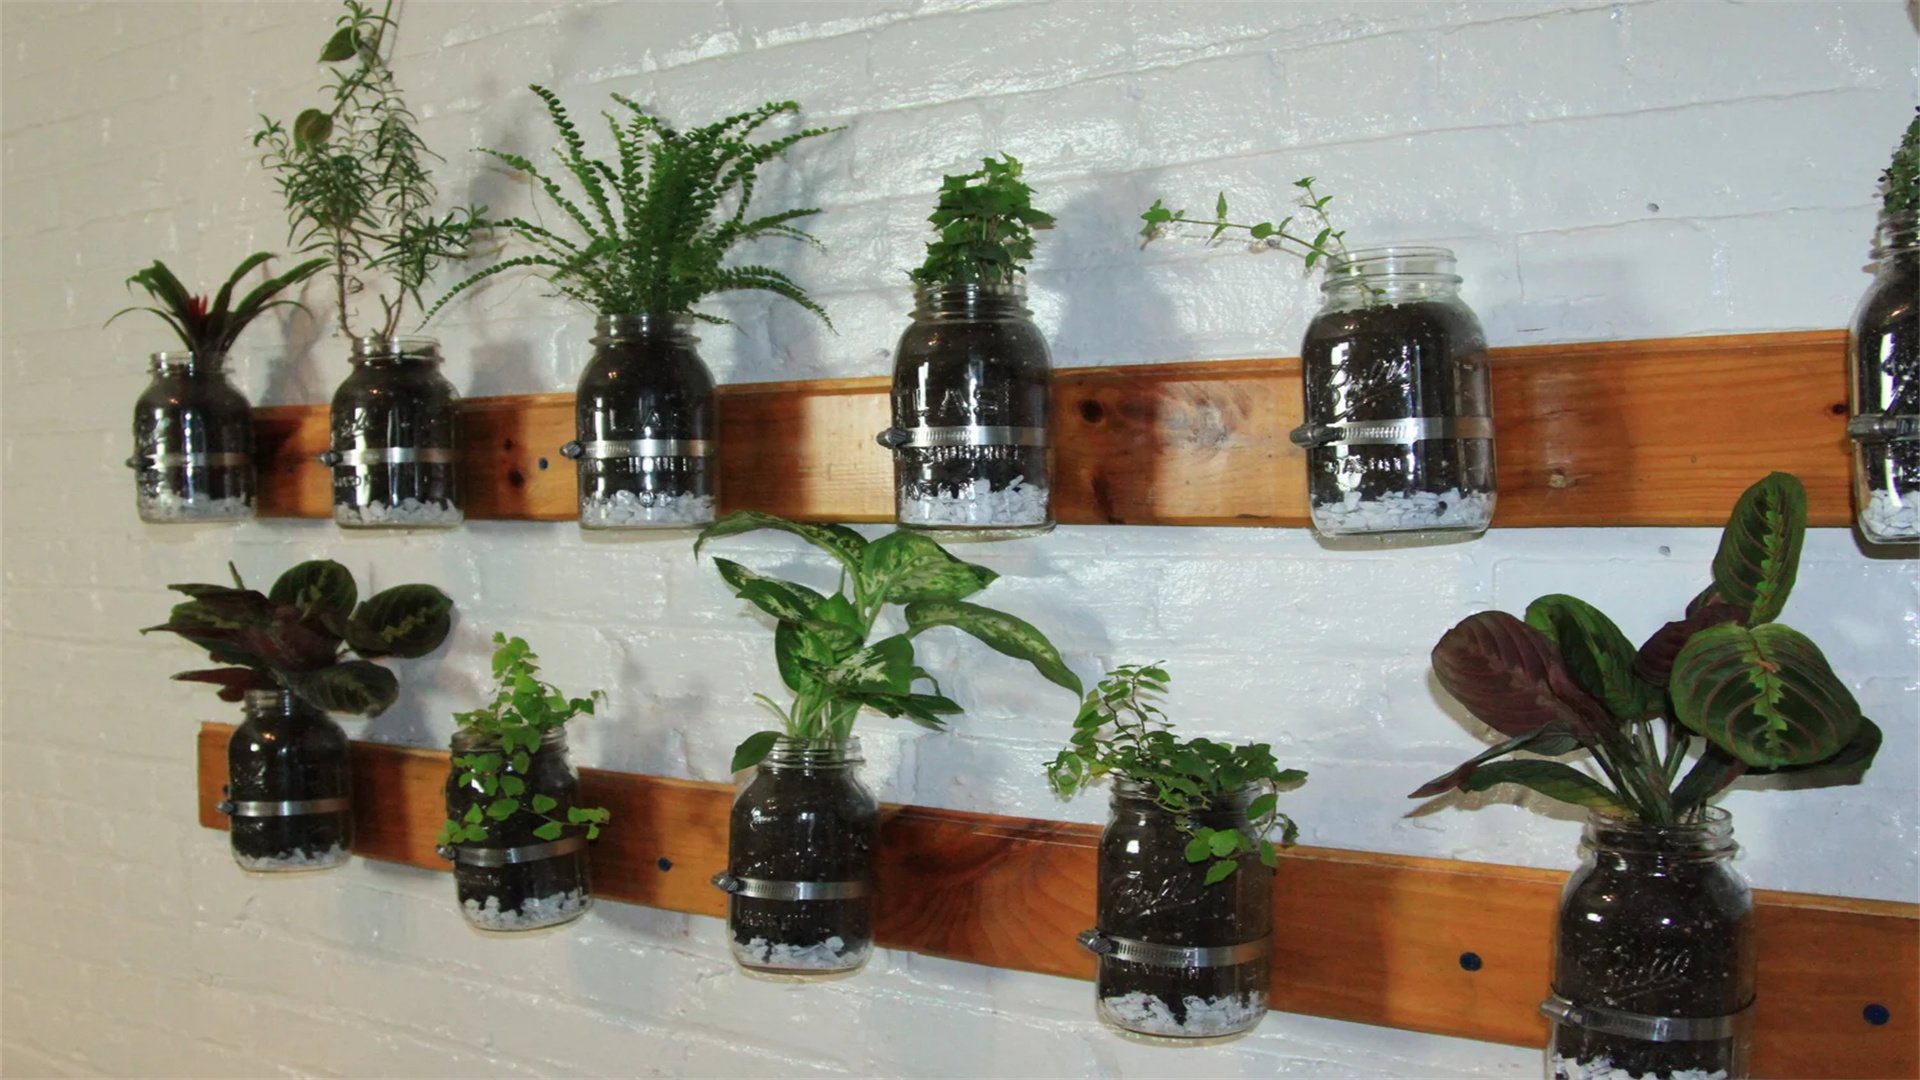
🌿 Project 4: DIY Mason Jar Herb Garden for the Kitchen
Overview
Mason jar herb gardens are easy to assemble and maintain, perfect for windowsills or countertops. They use simple materials like jars, soil, and herbs.
Materials Needed
- Mason jars with lids
- Potting soil and small rocks or pebbles
- Herb seeds or small plants (e.g., basil, mint, parsley)
- Drill with a small bit (for drainage holes, optional)
- Twine or labels for decoration
Step-by-Step Implementation
- Prepare the Jars: If using lids, drill a few small holes in them for drainage. Alternatively, use the jars without lids and add a layer of rocks at the bottom for drainage.
- Add Soil and Plants: Fill the jars with potting soil, leaving space at the top. Plant herb seeds or transplant small herb plants into the soil.
- Water and Label: Water the herbs lightly. Use twine or labels to mark each jar with the herb name for a rustic touch.
- Place in Sunlight: Position the jars in a sunny spot, like a kitchen window, where they can get at least 6 hours of sunlight daily.
- Maintain Regularly: Water as needed and trim herbs to encourage growth.
Advantages and Disadvantages
Advantages:
- Budget-friendly (under $20 for multiple jars)
- Promotes healthy eating
- Decorative and practical
- Easy to customize
Disadvantages:
- Requires regular maintenance
- Jars may break if handled roughly
- Drainage can be an issue without proper holes
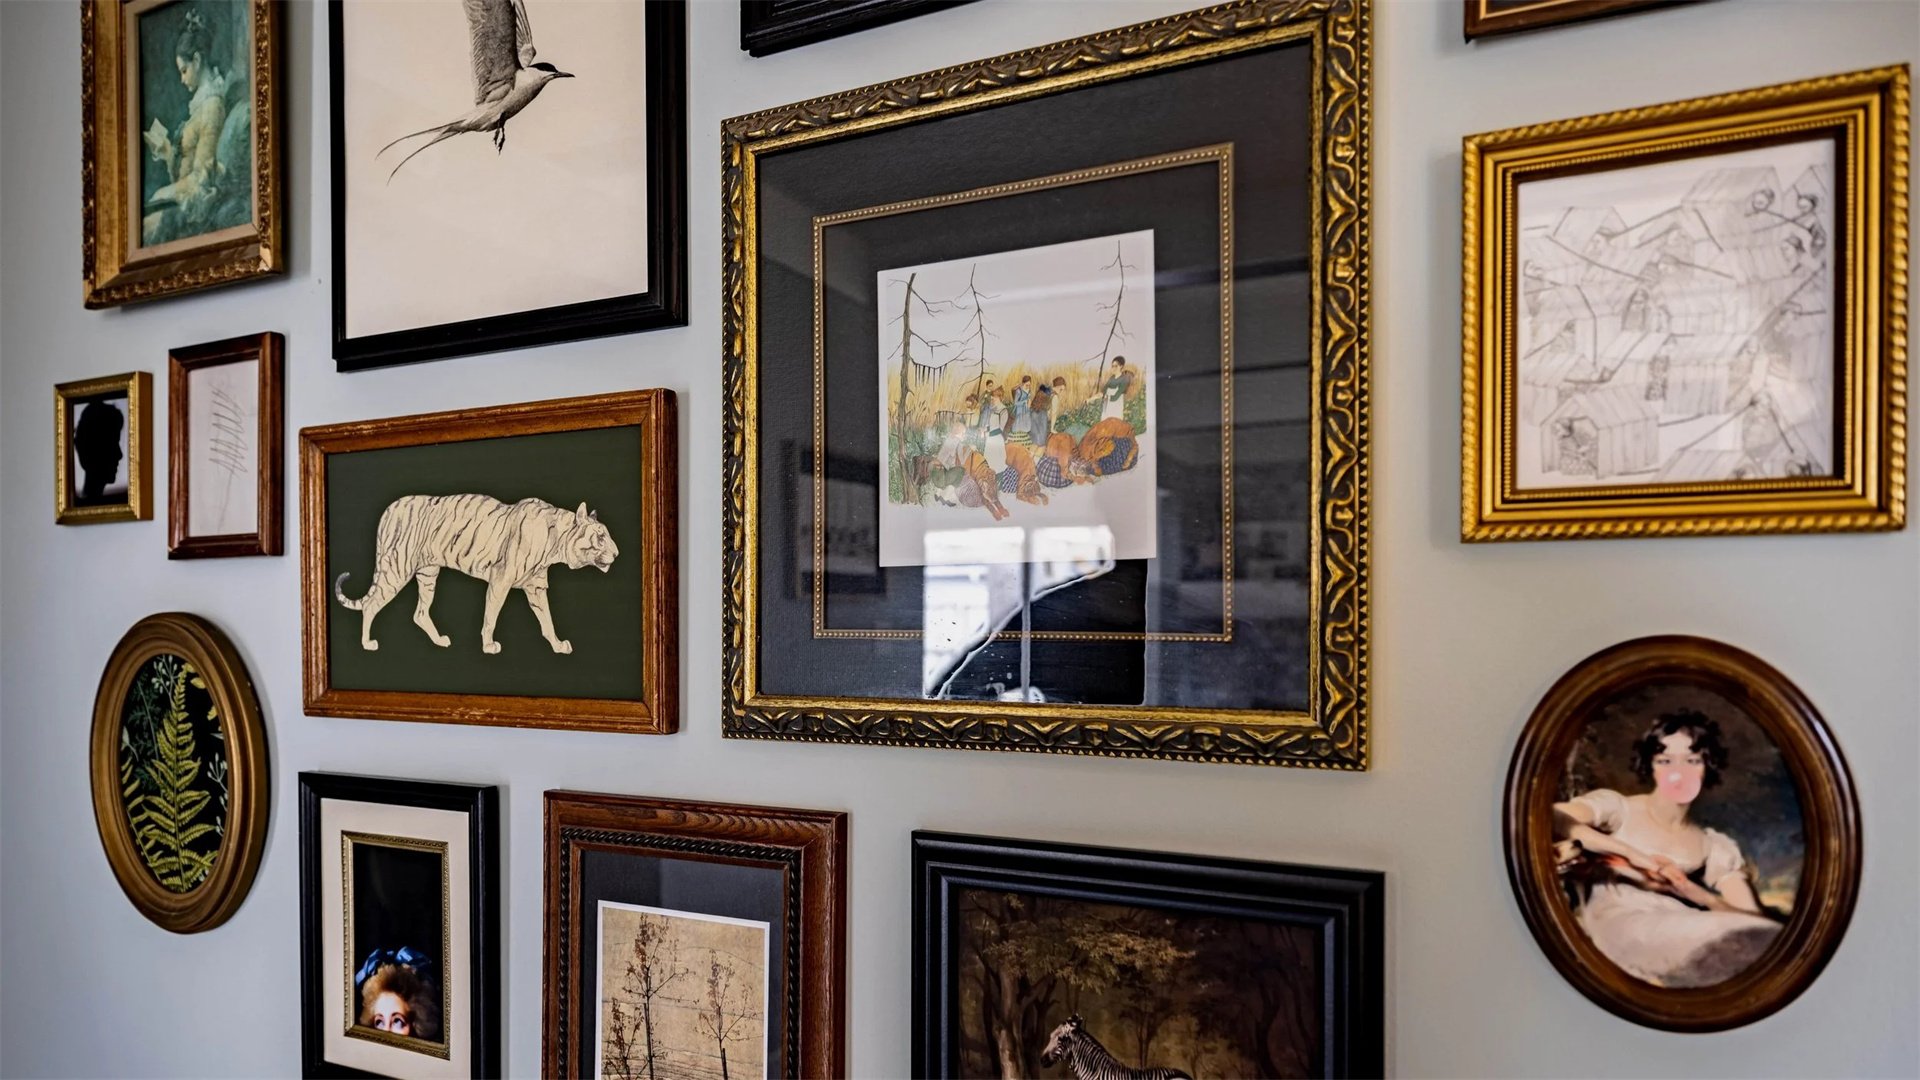
🖼️ Project 5: DIY Gallery Wall with Thrifted Frames
Overview
A gallery wall combines various frames and artwork in a cohesive layout. It's a creative way to display photos, prints, or memorabilia.
Materials Needed
- Thrifted frames in different sizes and styles
- Sandpaper and spray paint (to unify the frames, optional)
- Artwork or photos to frame
- Measuring tape, level, and pencil
- Picture hanging hooks or nails
Step-by-Step Implementation
- Collect and Prepare Frames: Visit thrift stores to find frames. Sand them down and spray paint in a consistent color if desired.
- Plan the Layout: Lay the frames on the floor to arrange them in a pleasing configuration. Consider symmetry or eclectic styles.
- Measure and Mark: Measure the wall space and mark where each frame will go. Use a level to ensure accuracy.
- Hang the Frames: Install picture hooks or nails at the marked spots. Hang the frames, starting from the center and working outward.
- Add Artwork: Insert your chosen photos or prints into the frames. Adjust as needed for balance.
Advantages and Disadvantages
Advantages:
- Cost-effective (frames can be found for $1-$5 each)
- Highly customizable
- Hides wall imperfections
- Creates a focal point
Disadvantages:
- Time-consuming to arrange and hang
- May require wall repairs if moved
- Frames can look mismatched without careful planning
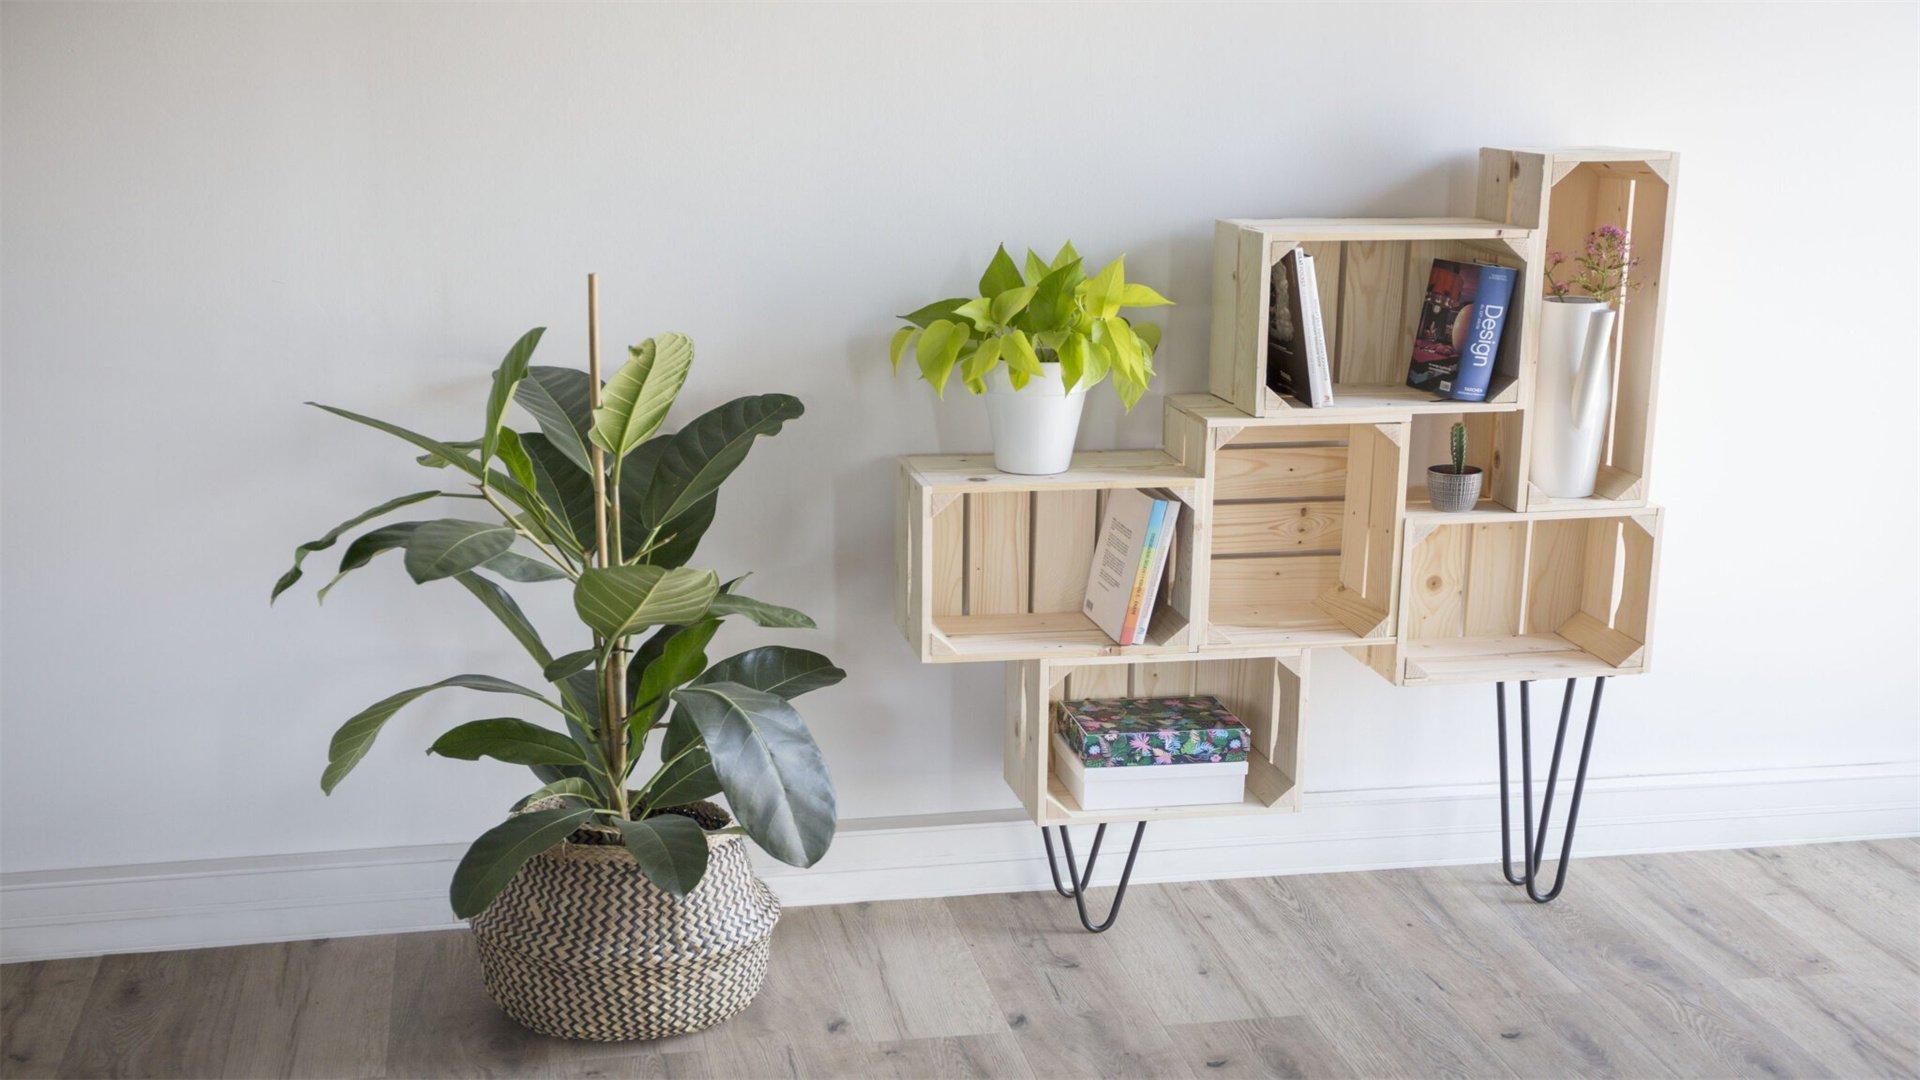
📦 Project 6: DIY Wooden Crate Storage for the Entryway
Overview
Wooden crates are versatile and can be stacked or arranged to form shelves or cubbies. They add a rustic touch while keeping clutter at bay.
Materials Needed
- Wooden crates (available at craft stores or online)
- Sandpaper and paint or stain (optional)
- Brackets and screws (for securing stacked crates)
- Drill and level
- Felt pads or casters (for mobility, optional)
Step-by-Step Implementation
- Prepare the Crates: Sand any rough edges on the crates. Apply paint or stain if you want a uniform look, and let dry.
- Plan the Arrangement: Decide how to stack the crates—vertically, horizontally, or in a grid. Consider the space available in your entryway.
- Secure the Crates: If stacking, use brackets and screws to attach crates together for stability. Drill from the inside to hide screws.
- Anchor to Wall (Optional): For taller stacks, anchor the structure to the wall to prevent tipping.
- Add Finishing Touches: Attach felt pads to the bottom to protect floors, or add casters for easy moving. Fill with baskets or bins for organization.
Advantages and Disadvantages
Advantages:
- Inexpensive (crates cost around $10-$15 each)
- Customizable in configuration
- Provides ample storage
- Easy to disassemble
Disadvantages:
- Can be bulky
- May require wall anchoring for safety
- Wood may splinter if not sanded properly
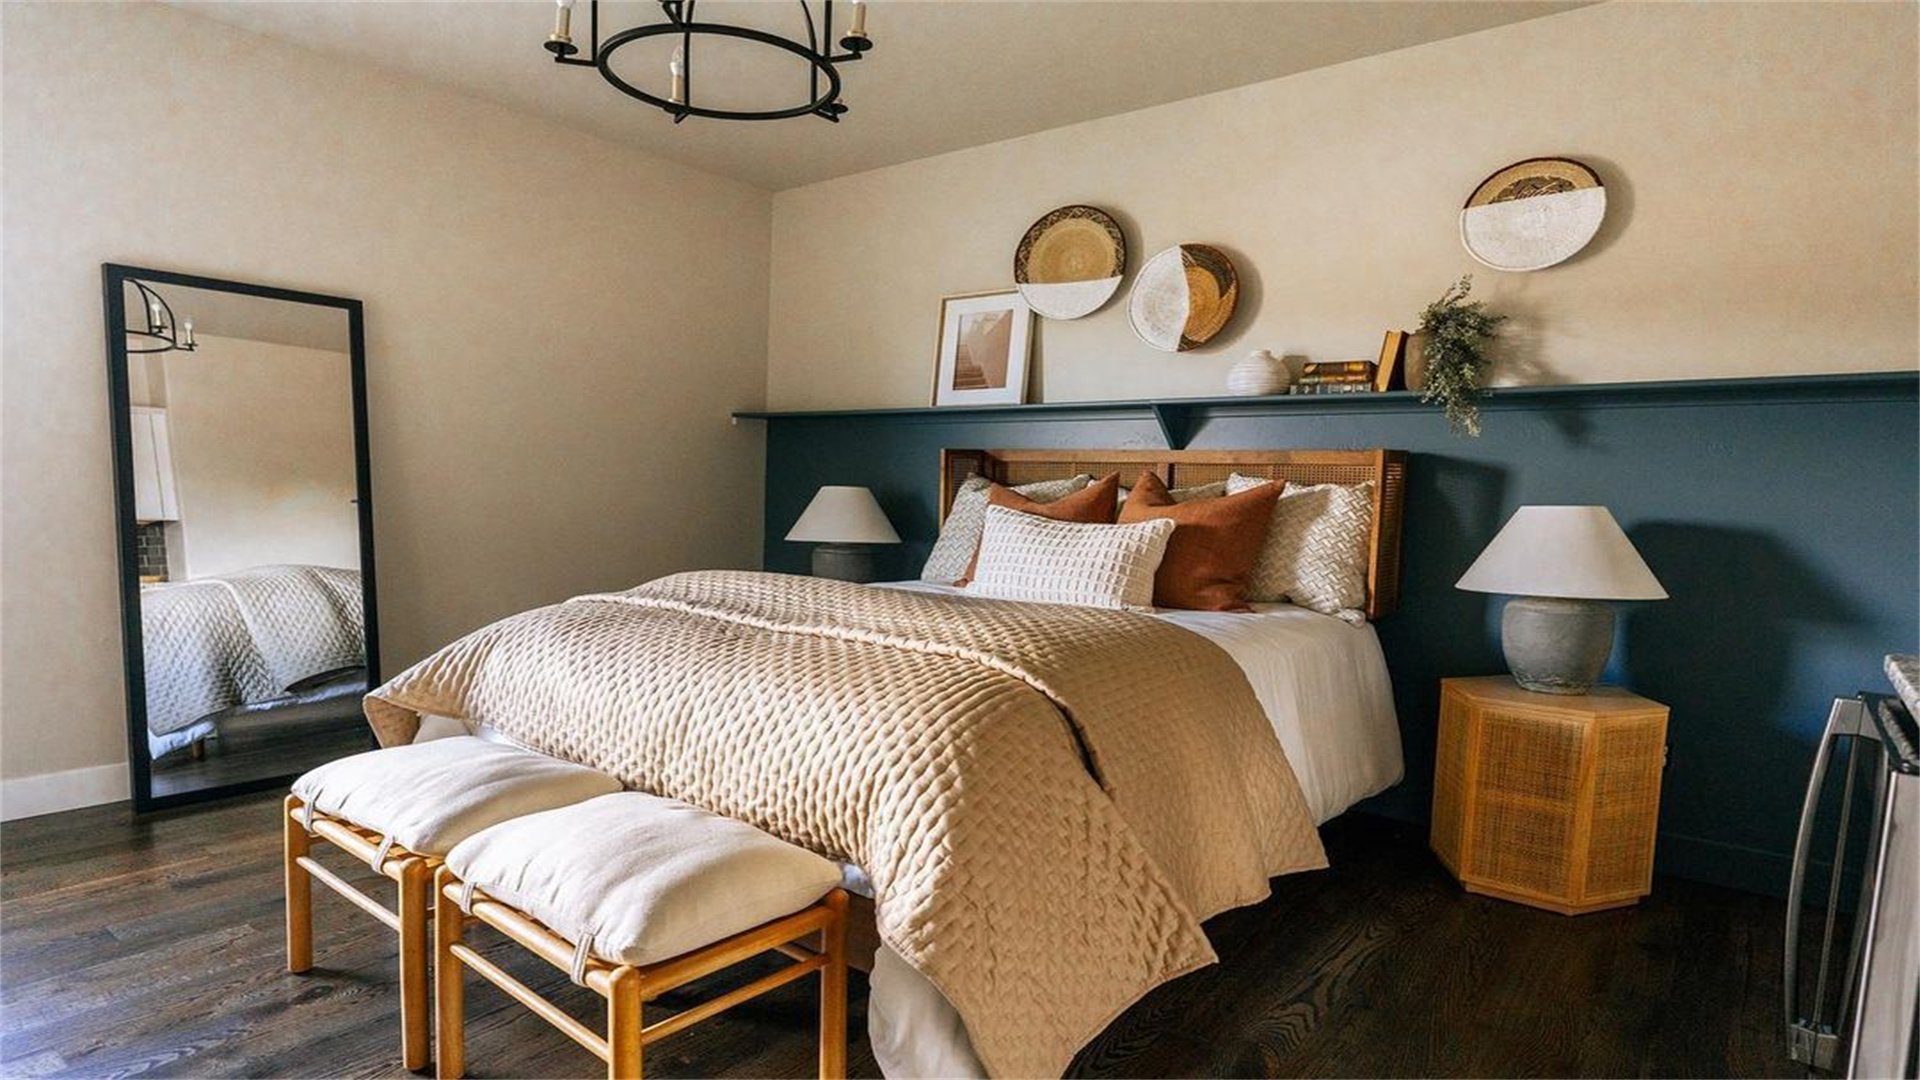
🎨 Project 7: DIY Painted Accent Wall in the Bedroom
Overview
An accent wall involves painting one wall in a bold color or pattern, such as stripes or geometric designs. It's a quick way to refresh the space.
Materials Needed
- Paint in your chosen color(s)
- Paint rollers, brushes, and painter's tape
- Drop cloths to protect floors
- Sandpaper and primer (if needed)
- Level and measuring tape for patterns
Step-by-Step Implementation
- Prepare the Wall: Clean the wall and repair any holes with spackle. Sand smooth and apply primer if painting over a dark color.
- Tape Off Areas: Use painter's tape to mark off the accent wall boundaries or create patterns like stripes. Ensure tape is pressed down firmly to prevent bleed.
- Paint the Wall: Apply paint with a roller for large areas and a brush for edges. For patterns, paint one color at a time, allowing drying between coats.
- Remove Tape Carefully: Once the paint is dry to the touch, slowly remove the painter's tape at a 45-degree angle to reveal clean lines.
- Touch Up as Needed: Inspect for any missed spots or bleeds and touch up with a small brush.
Advantages and Disadvantages
Advantages:
- Low cost (paint is affordable)
- High visual impact
- Can be done in a day
- Easily changed later
Disadvantages:
- Requires precision with tape
- May need multiple coats
- Accent colors can dominate the room if not balanced
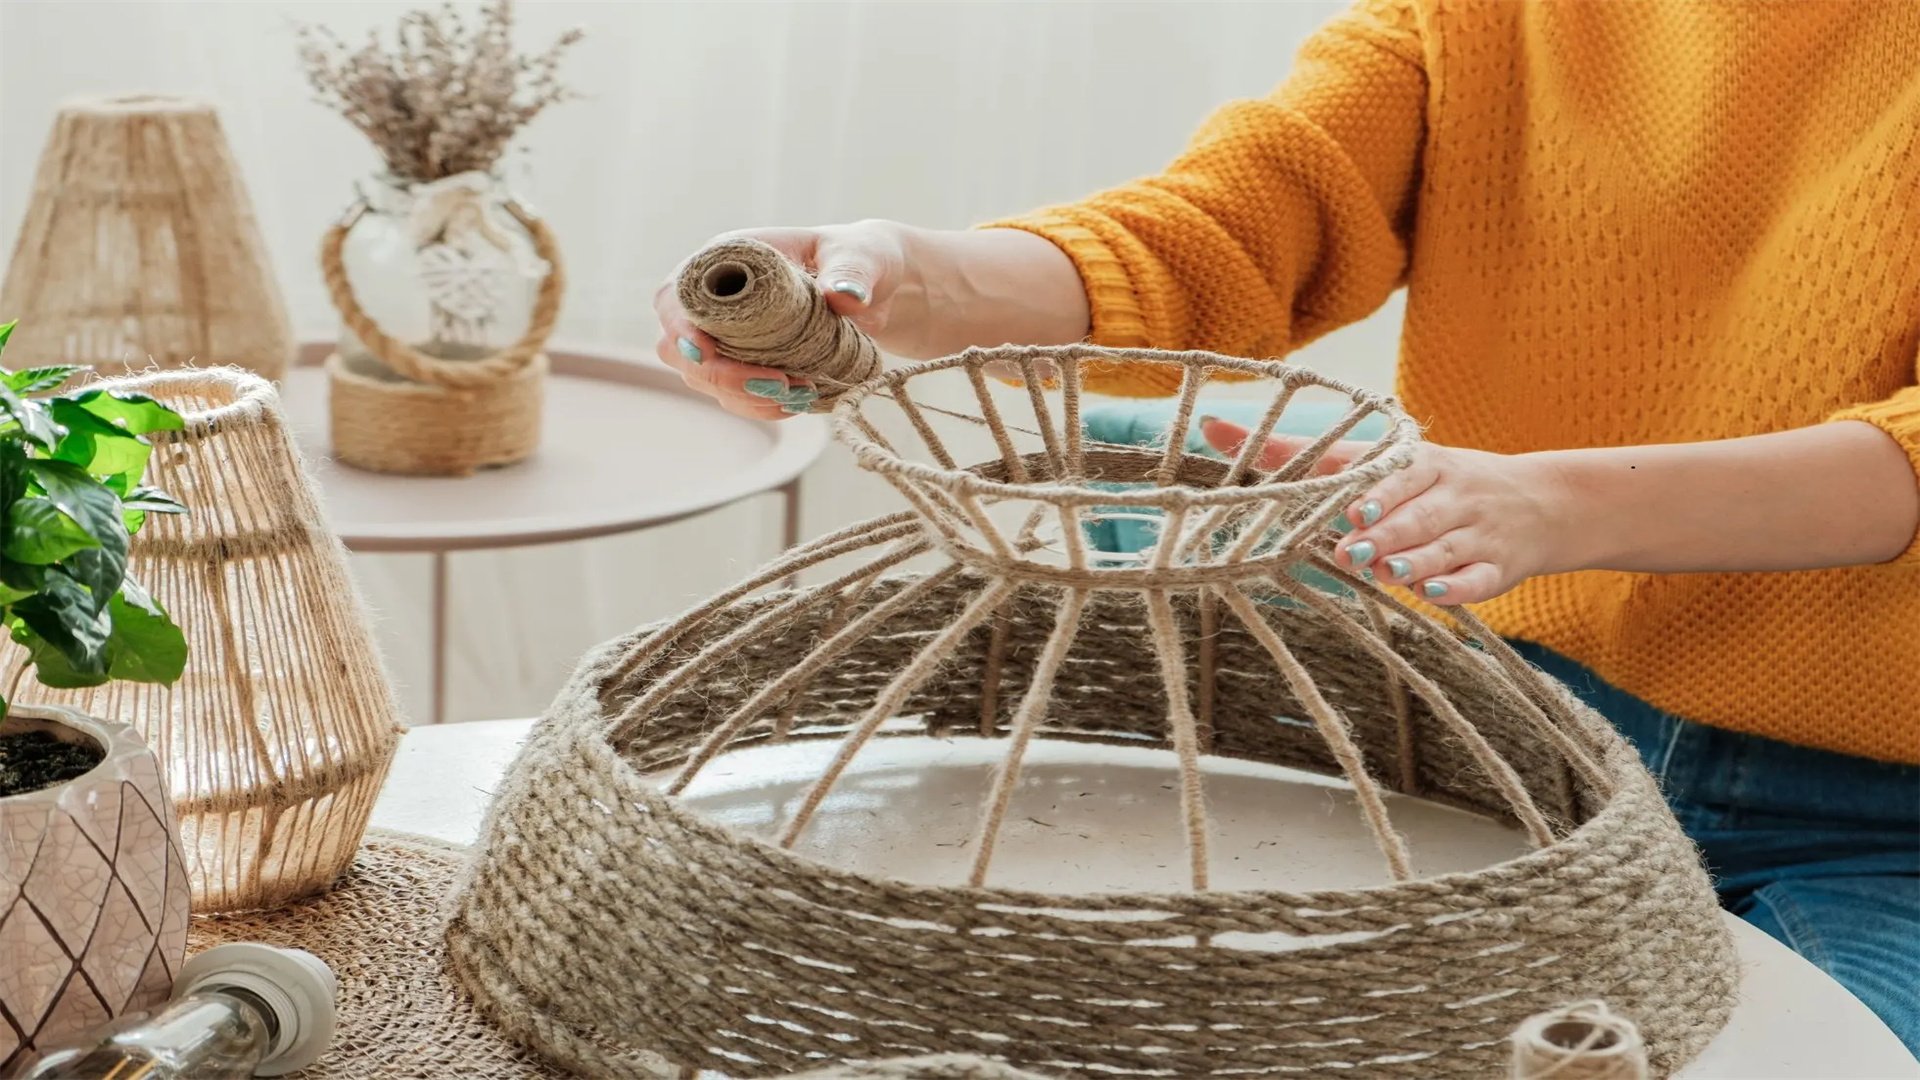
🧵 Project 8: DIY Rope-Wrapped Vases for Decorative Storage
Overview
Rope-wrapped vases are simple to make and can be used to hold flowers, utensils, or as standalone decor. They require minimal materials.
Materials Needed
- Glass vases or jars (thrifted or from dollar stores)
- Natural rope or jute twine
- Hot glue gun and glue sticks
- Scissors
- Optional: paint or stain for the rope
Step-by-Step Implementation
- Clean the Vases: Ensure the vases are clean and dry. Remove any labels or adhesive residue.
- Start Wrapping: Apply a dab of hot glue to the bottom of the vase and attach the end of the rope. Begin wrapping tightly around the vase, adding glue every few inches to secure.
- Continue to the Top: Wrap evenly, keeping the rope close together without gaps. For a patterned look, vary the rope thickness or add beads.
- Finish and Trim: When you reach the top, apply a final dot of glue and cut the rope. Press the end firmly to adhere.
- Customize: If desired, paint the rope with acrylic paint or stain for a colored effect. Let dry completely before use.
Advantages and Disadvantages
Advantages:
- Very affordable (under $10 per vase)
- Easy for beginners
- Adds natural texture
- Customizable in size and style
Disadvantages:
- Hot glue can be messy
- Rope may unravel if not secured well
- Vases may not be waterproof if glue seeps inside
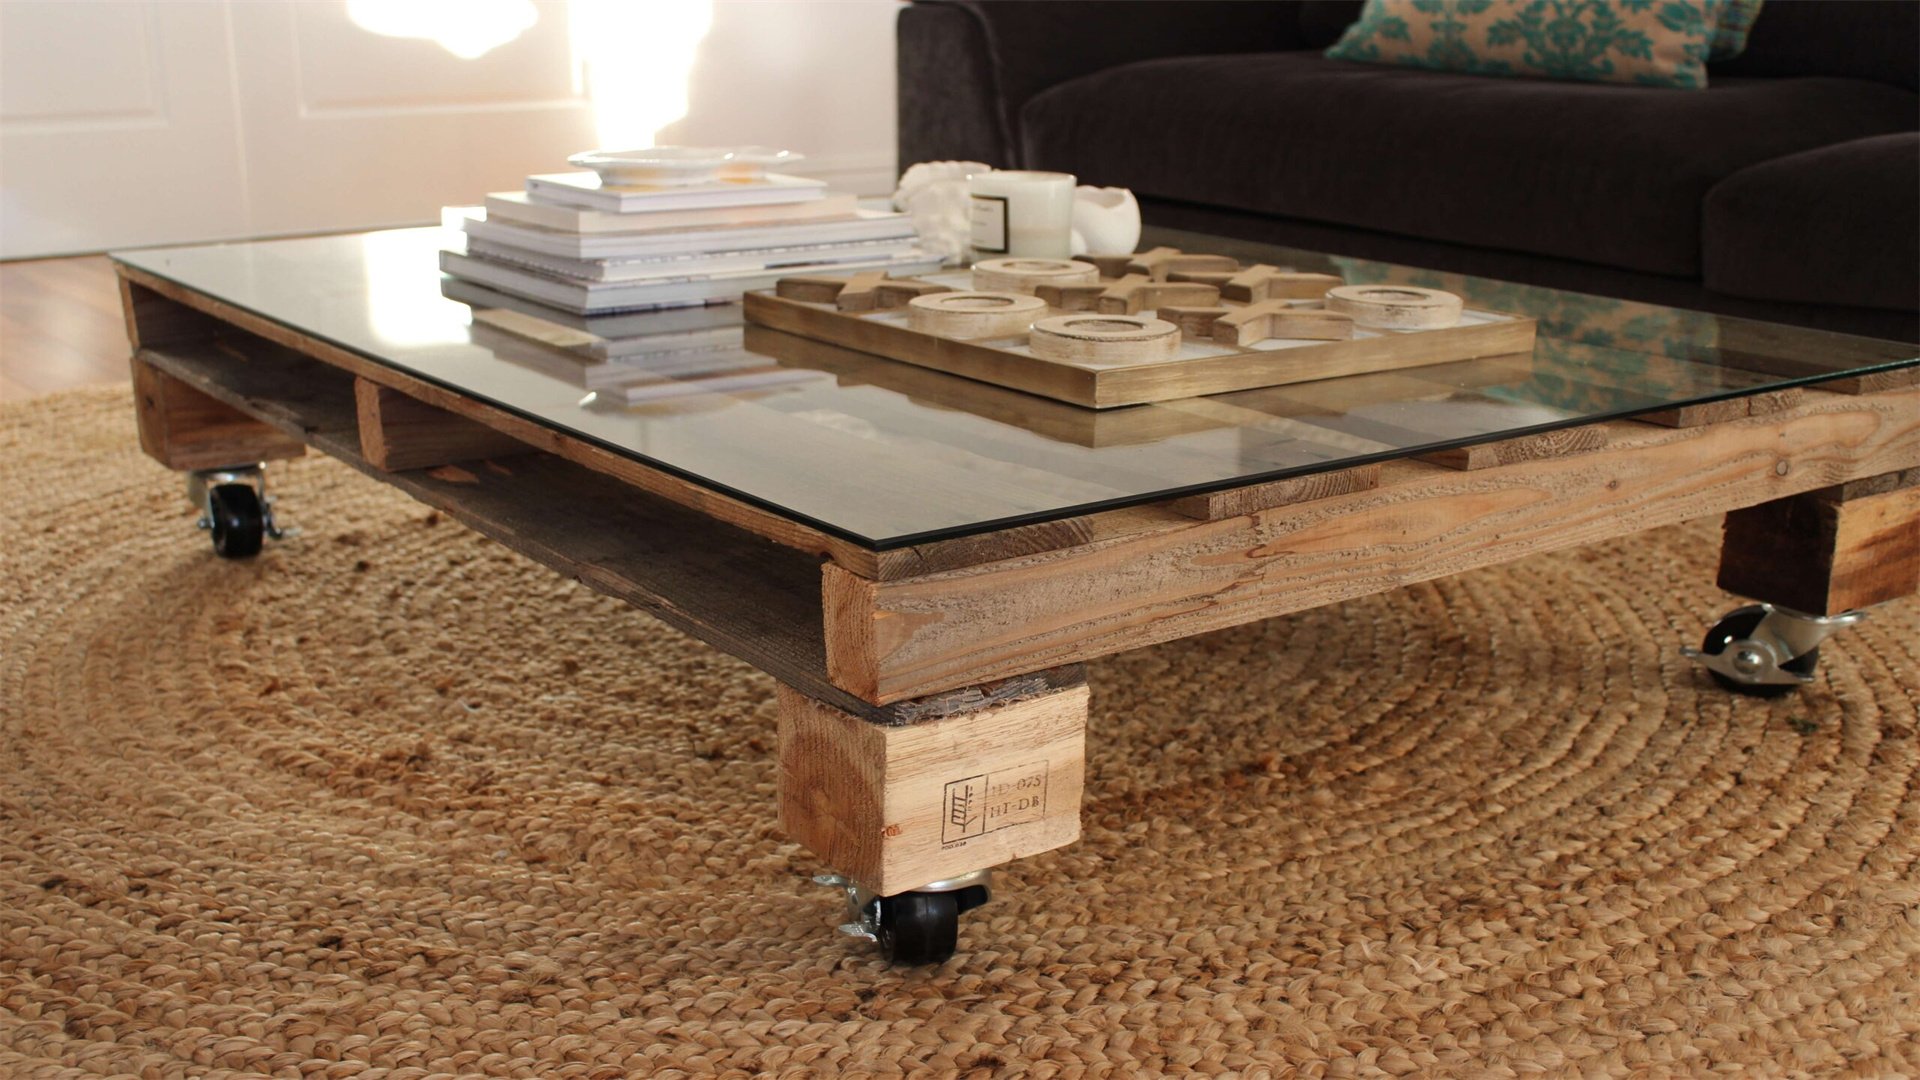
⚖️ Project 9: DIY Pallet Coffee Table for the Living Room
Overview
Pallet coffee tables are sturdy and can be customized with wheels, storage, or a glass top. They often use reclaimed materials for an eco-friendly approach.
Materials Needed
- Wooden pallets (free or low-cost from local businesses)
- Sander or sandpaper
- Wood stain or paint
- Castors or legs (optional)
- Drill, screws, and saw (if cutting pallets)
Step-by-Step Implementation
- Source and Prepare Pallets: Find clean, intact pallets. Disassemble if needed, and sand all surfaces to remove splinters.
- Assemble the Tabletop: Arrange pallet boards to form a tabletop. Secure them together with screws from underneath.
- Add Legs or Base: Attach pre-made legs or use additional pallet wood to build a base. For mobility, screw castors to the bottom.
- Finish the Wood: Apply stain or paint to protect the wood and match your decor. Let dry thoroughly.
- Optional Add-ons: Consider adding a lower shelf for storage or a glass top for a polished look. Secure all parts firmly.
Advantages and Disadvantages
Advantages:
- Extremely low cost (often free)
- Durable and sturdy
- Eco-friendly
- Highly customizable
Disadvantages:
- Requires tools and basic carpentry skills
- Pallets may contain chemicals (use heat-treated ones)
- Can be heavy to move
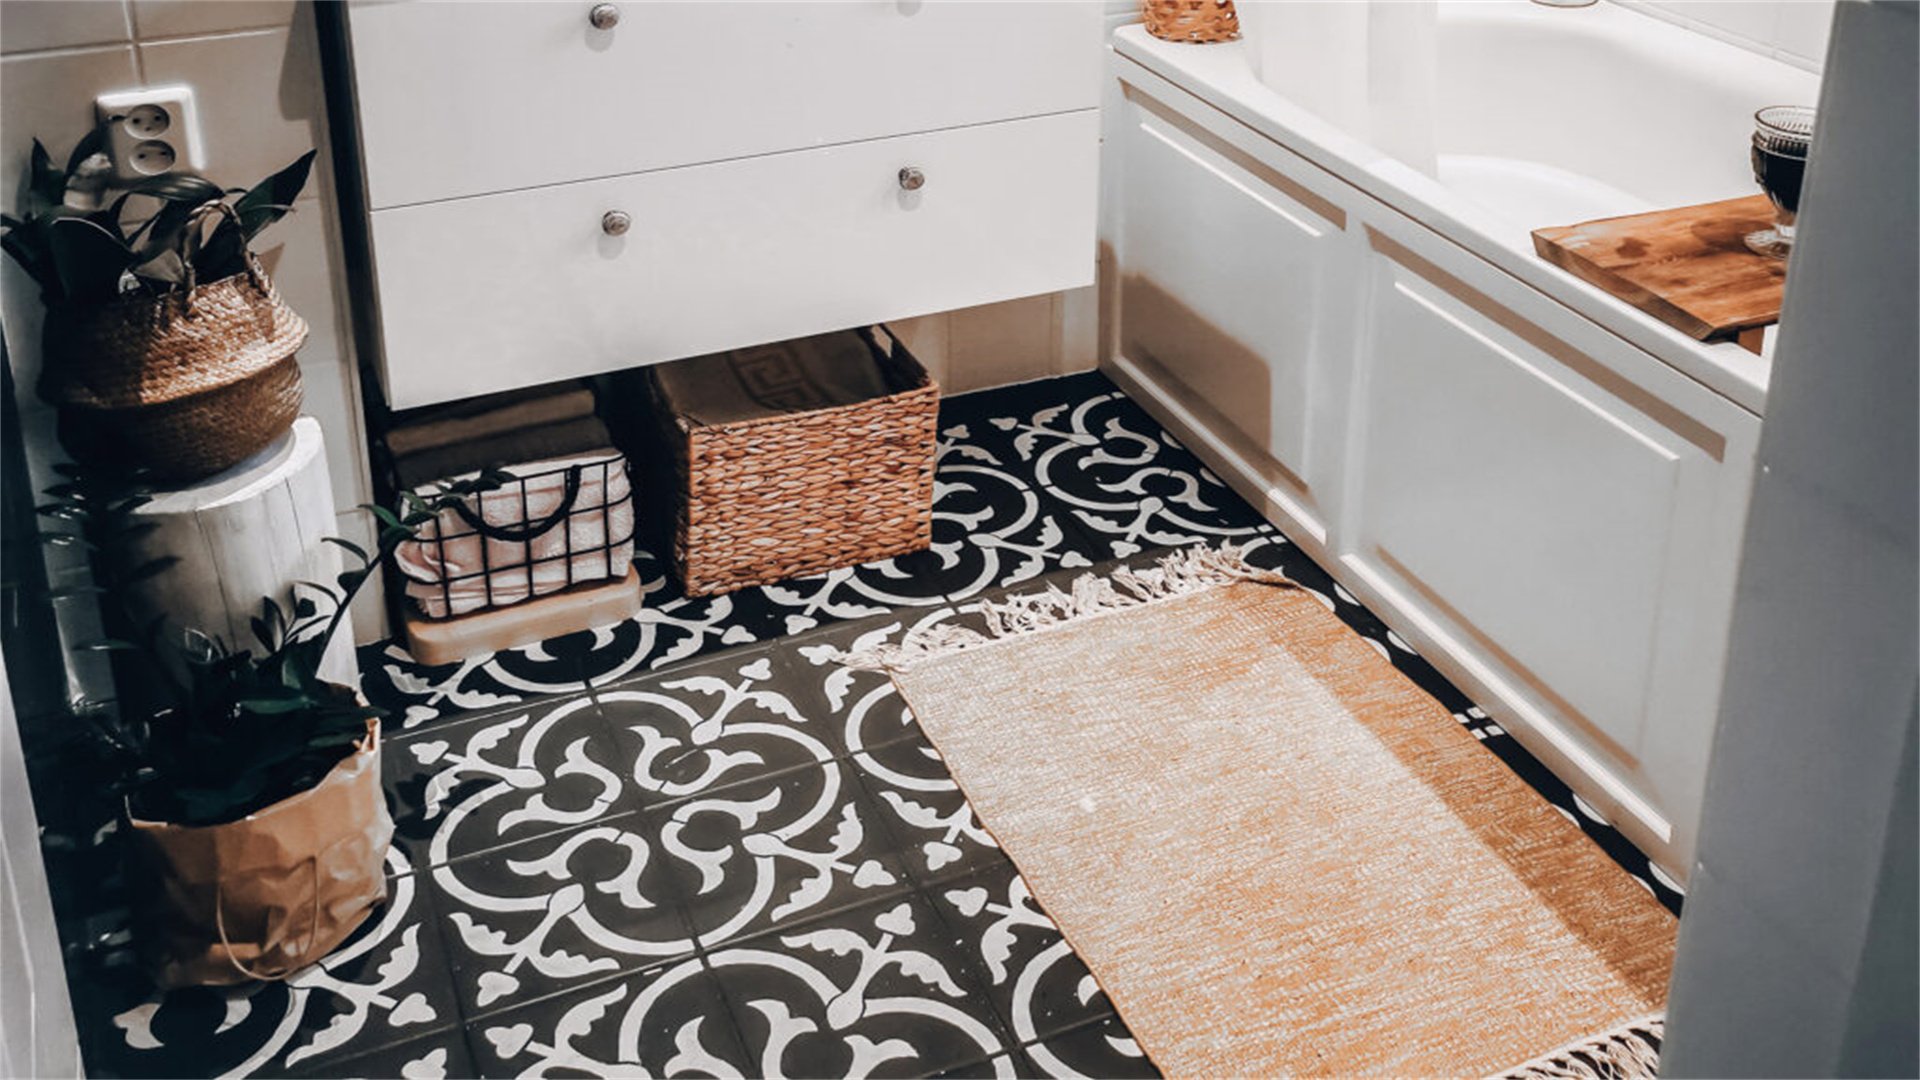
🛁 Project 10: DIY Stenciled Floor Mat for the Bathroom
Overview
Using stencils and fabric paint, you can create custom designs on a cotton or coir mat. It's a quick upgrade that hides wear and tear.
Materials Needed
- Plain floor mat (light-colored works best)
- Fabric paint and stencil brushes
- Stencils (purchased or homemade from cardboard)
- Painter's tape and drop cloth
- Fabric sealant (optional, for durability)
Step-by-Step Implementation
- Prepare the Mat: Lay the mat on a drop cloth in a well-ventilated area. Ensure it's clean and dry.
- Position the Stencil: Use painter's tape to secure the stencil on the mat. Plan the design layout, such as a border or all-over pattern.
- Apply Paint: Dip the stencil brush in fabric paint, then blot excess on paper towel. Dab the paint over the stencil, keeping the brush perpendicular to avoid bleed.
- Repeat and Dry: Carefully lift the stencil and reposition for the next section. Allow each color to dry before adding another to prevent smudging.
- Seal the Design: Once fully dry, apply fabric sealant according to product instructions to protect the paint from washing out.
Advantages and Disadvantages
Advantages:
- Cost-effective (under $20 for supplies)
- Allows for creative expression
- Extends the life of old mats
- Easy to wash if sealed
Disadvantages:
- Paint may crack over time
- Requires careful application to avoid mistakes
- May not be as durable as commercial mats
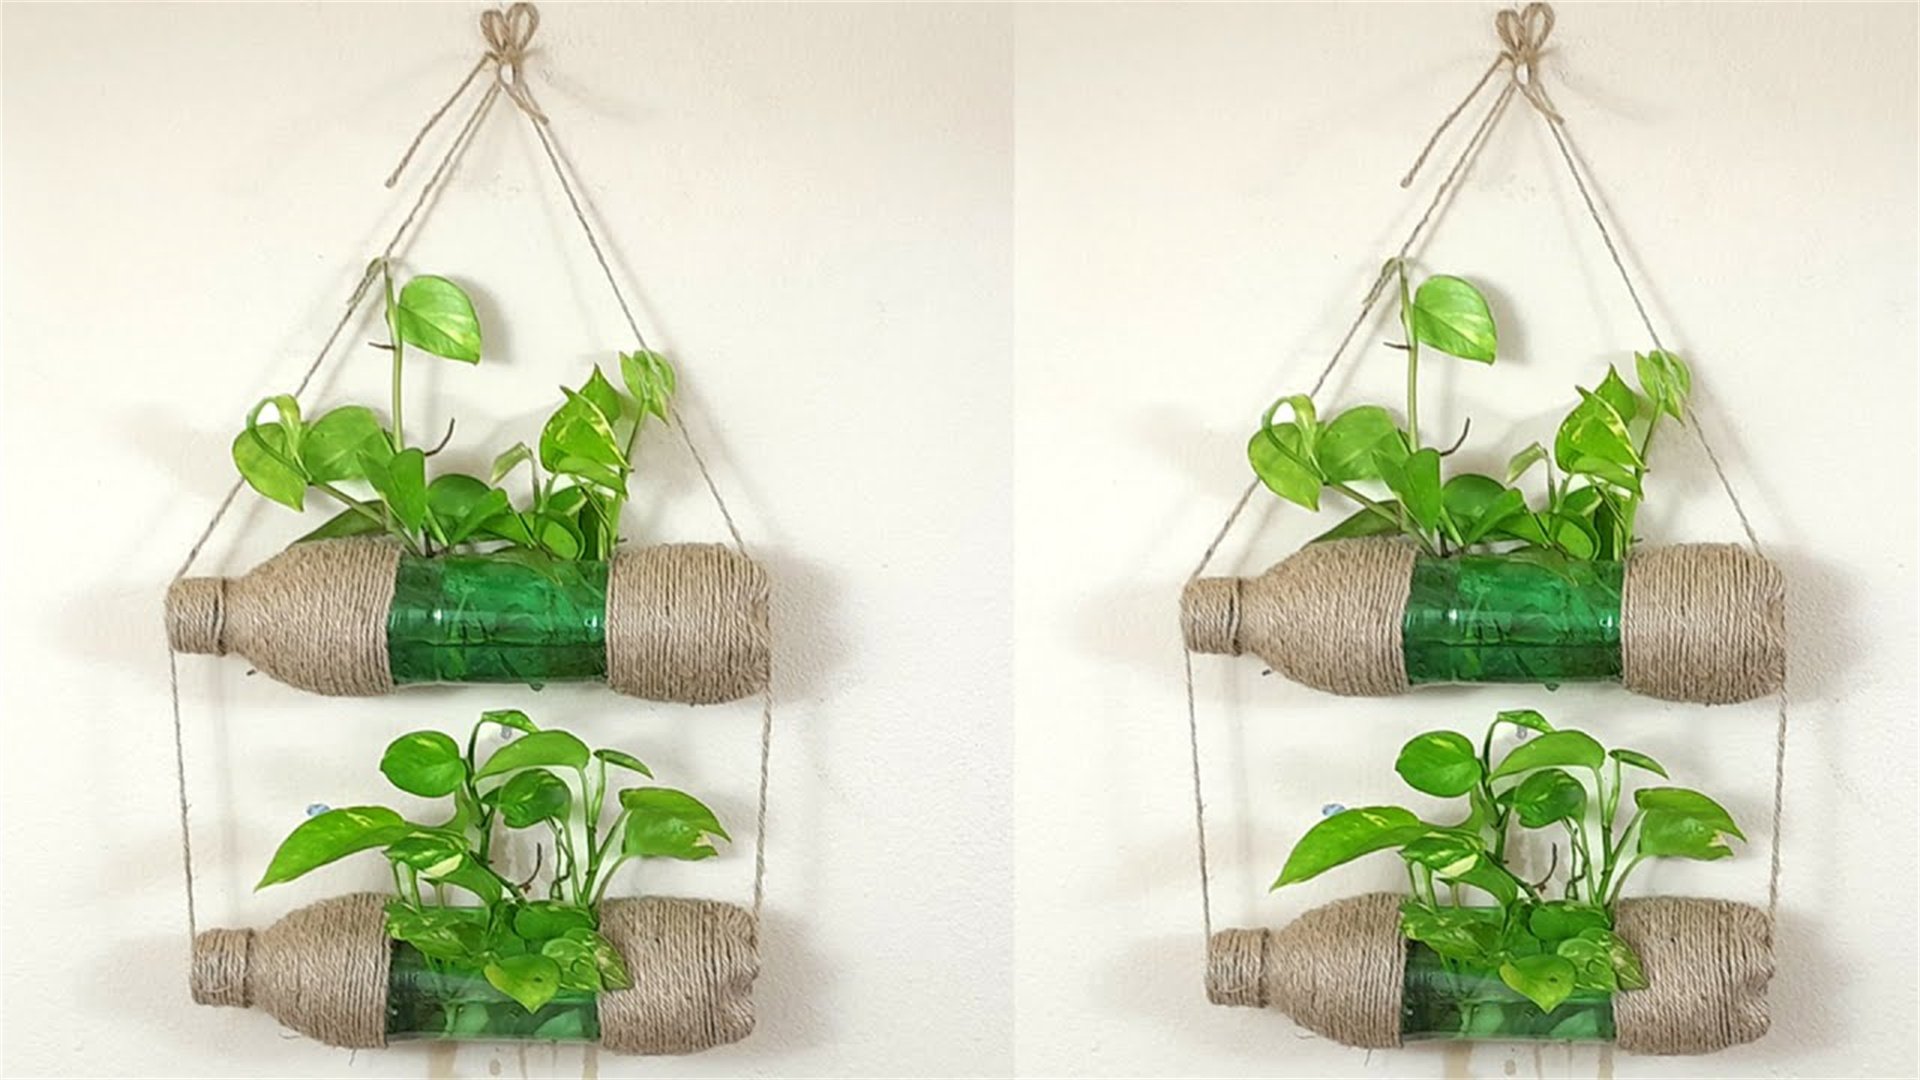
🌱 Project 11: DIY Hanging Planters from Recycled Containers
Overview
Hanging planters are perfect for balconies, patios, or indoor corners. They utilize vertical space and can be made from everyday items.
Materials Needed
- Recycled containers (e.g., cans, bottles, jars)
- Drill or nail and hammer (for drainage holes)
- Rope, chain, or macramé cord for hanging
- Paint and brushes (for decoration, optional)
- Potting soil and small plants or succulents
Step-by-Step Implementation
- Prepare Containers: Clean containers thoroughly. Use a drill or nail to poke drainage holes in the bottom.
- Decorate (Optional): Paint the containers with outdoor-safe paint or wrap them with twine for a rustic look. Let dry completely.
- Attach Hanging Cords: Cut ropes to desired length. For cans, punch holes near the rim and thread rope through, tying knots inside to secure. For bottles, cut openings and attach cords around the neck.
- Add Plants: Fill containers with potting soil and plant small herbs, flowers, or succulents. Water lightly.
- Hang and Arrange: Suspend the planters from hooks or rods. Adjust heights for a tiered effect and ensure they receive adequate light.
Advantages and Disadvantages
Advantages:
- Nearly free using recycled materials
- Eco-friendly
- Customizable in size and color
- Ideal for small spaces
Disadvantages:
- Containers may rust or degrade outdoors
- Drainage can be tricky
- Plants may require frequent watering
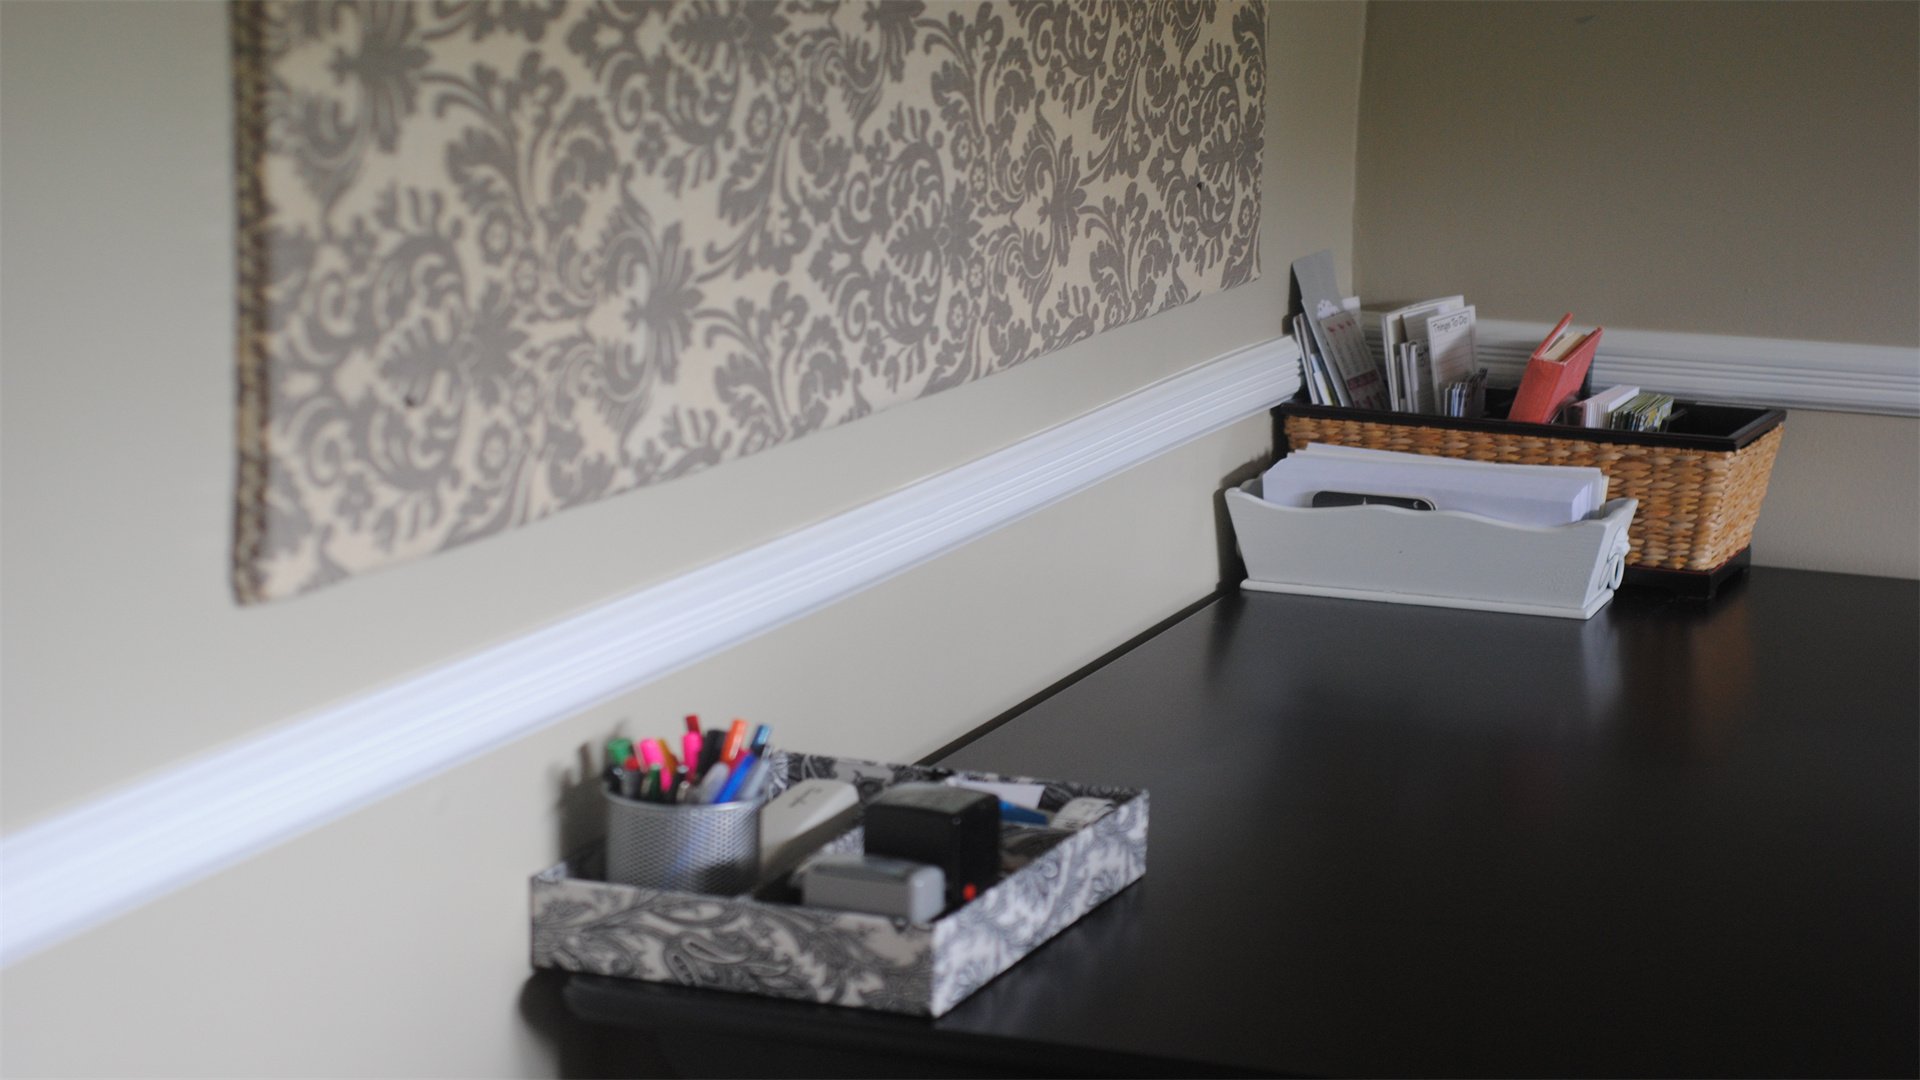
📌 Project 12: DIY Fabric-Covered Bulletin Board for the Home Office
Overview
A fabric-covered bulletin board provides a soft backdrop for pins and photos. It's easy to customize with any fabric pattern to match your decor.
Materials Needed
- Corkboard or foam board
- Fabric of your choice (enough to cover the board with extra)
- Staple gun and staples
- Scissors and measuring tape
- Ribbon or trim (optional, for a grid pattern)
Step-by-Step Implementation
- Cut the Board: If needed, cut the corkboard to your desired size using a utility knife.
- Cut the Fabric: Lay the fabric face down and place the board on top. Cut fabric, leaving about 2 inches of excess on all sides.
- Staple the Fabric: Pull the fabric taut over one edge of the board and staple it to the back. Repeat on the opposite side, then the remaining sides, folding corners neatly like a present.
- Add Ribbon Grid (Optional): For a decorative grid, measure and staple ribbons crisscross over the front, then secure ends at the back.
- Mount the Board: Attach picture hanging hardware to the back or use command strips for a damage-free installation.
Advantages and Disadvantages
Advantages:
- Inexpensive (under $30 for materials)
- Hides old corkboard stains
- Adds personal style
- Functional for organization
Disadvantages:
- Fabric may get dirty over time
- Stapling requires care to avoid wrinkles
- Board may be heavy to hang
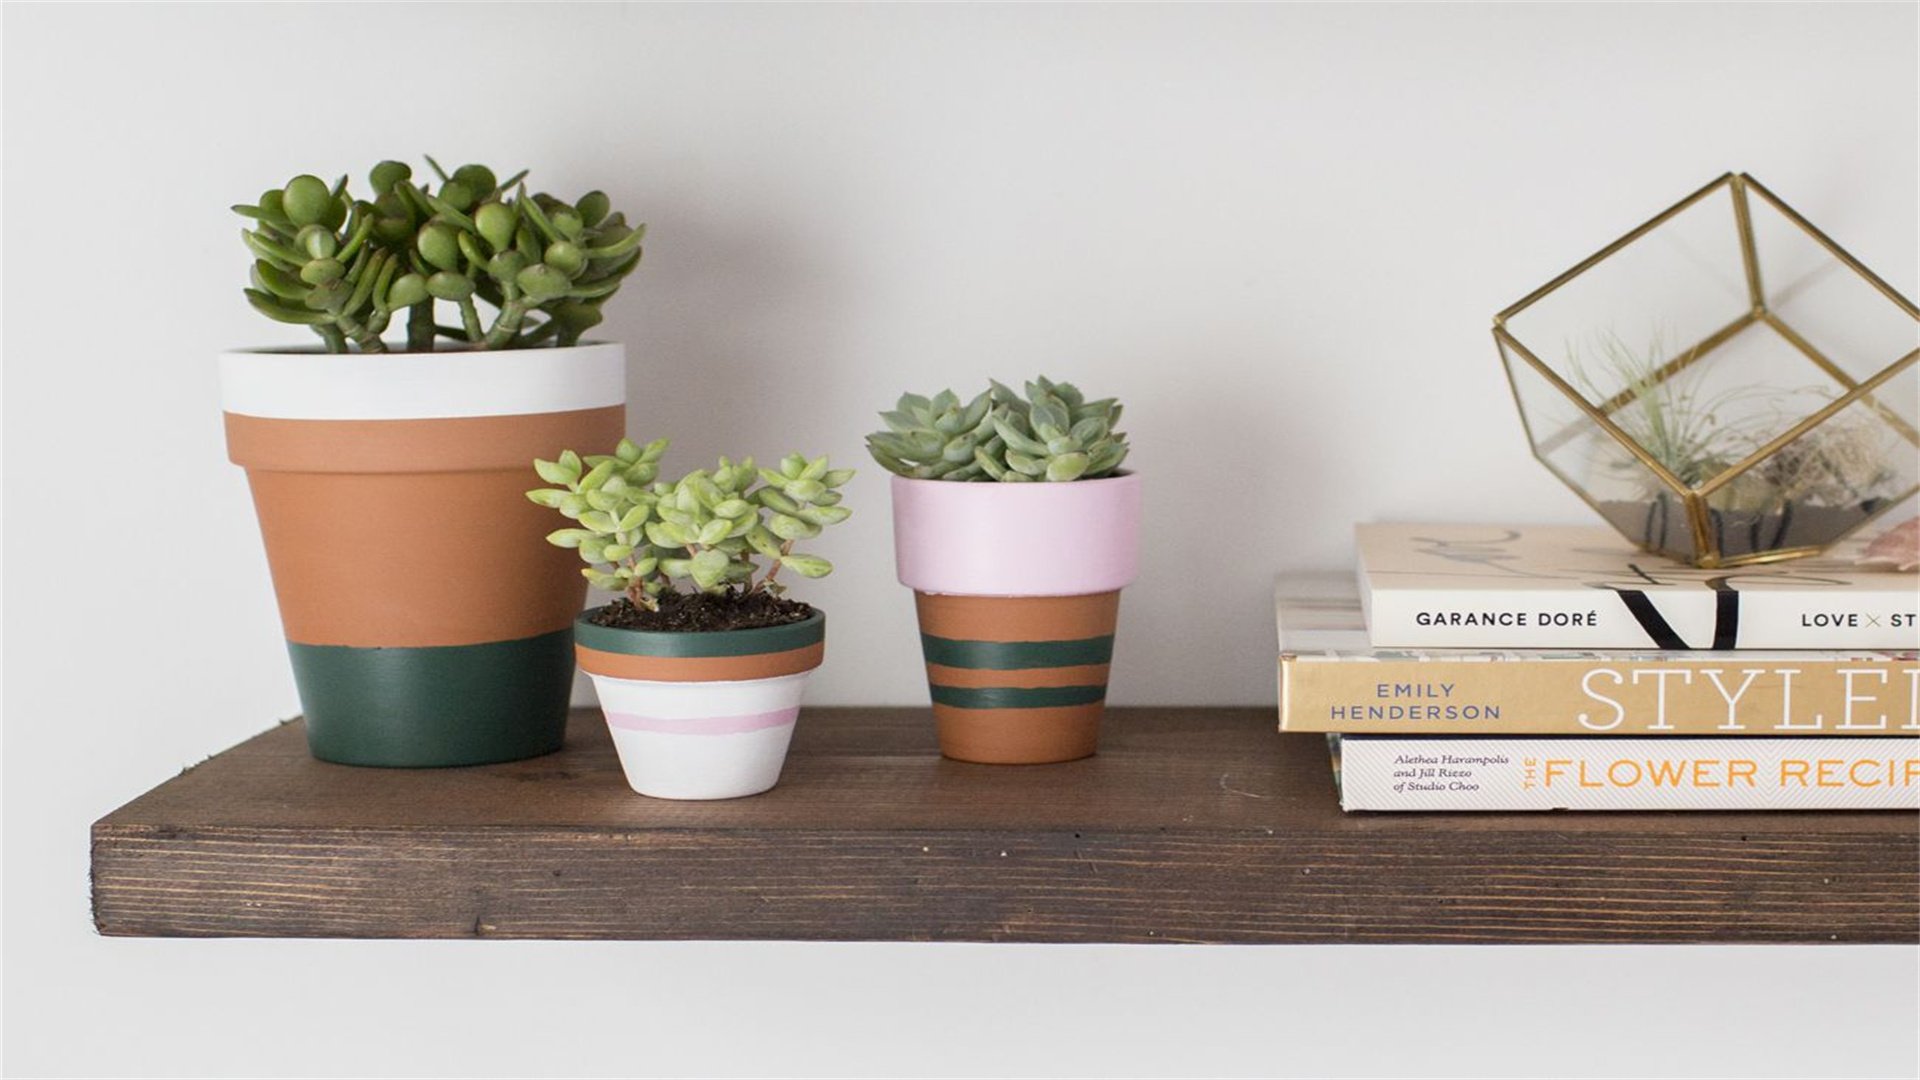
💡 Project 13: DIY Painted Terracotta Pots for Indoor Plants
Overview
Terracotta pots are affordable and breathable for plants. Painting them with acrylics or spray paint can transform their appearance in minutes.
Materials Needed
- Terracotta pots (various sizes)
- Acrylic paint or spray paint (outdoor-safe if pots will be outside)
- Paintbrushes or sponges
- Sealer (mod podge or clear spray)
- Sandpaper (optional, for a distressed look)
Step-by-Step Implementation
- Prepare the Pots: Clean pots to remove dust. If using old pots, scrub off any residue. Let dry completely.
- Prime (Optional): For better paint adhesion, apply a primer or base coat of white paint. This is especially helpful for dark colors.
- Paint the Pots: Use brushes for detailed designs or spray paint for solid colors. Apply multiple thin coats, allowing drying between each. For patterns, use tape or stencils.
- Add Details: Once base coats are dry, add hand-painted designs like stripes, dots, or floral motifs using contrasting colors.
- Seal the Paint: After the paint dries completely, apply a sealer to protect from moisture and fading. Let cure before planting.
Advantages and Disadvantages
Advantages:
- Very low cost (pots are cheap)
- Quick and easy
- Allows for endless creativity
- Can unify plant displays
Disadvantages:
- Paint may chip over time
- Sealing is necessary for outdoor use
- Pots may lose some breathability if sealed heavily
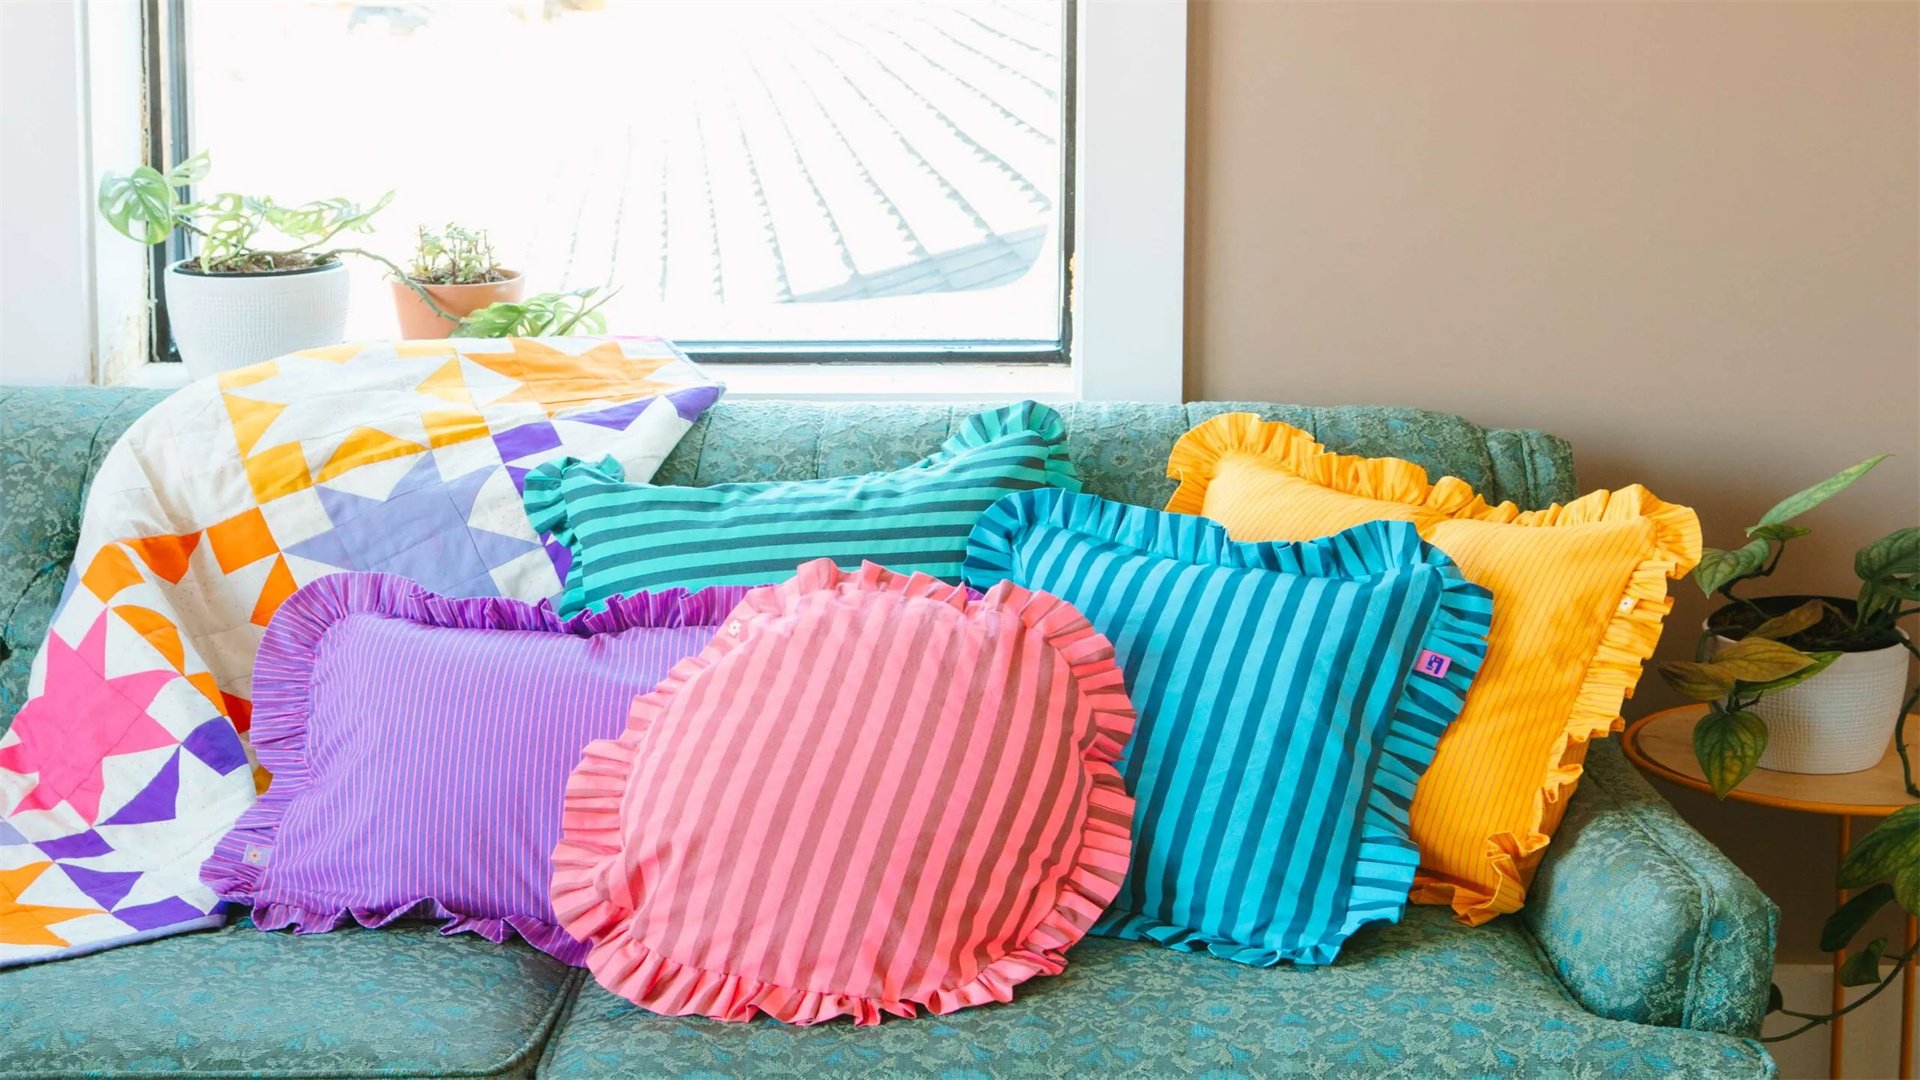
🛋️ Project 14: DIY No-Sew Throw Pillow Covers
Overview
No-sew pillow covers involve cutting fabric to size and using adhesive or iron-on tape to create envelopes or covers for existing pillows.
Materials Needed
- Fabric (such as cotton or linen, enough to cover pillows)
- Fabric glue or iron-on hem tape
- Scissors and measuring tape
- Pillow inserts
- Iron (if using hem tape)
Step-by-Step Implementation
- Measure and Cut Fabric: Measure your pillow insert. For an envelope cover, cut a piece of fabric that is the pillow width plus 1 inch, and the height plus half the width for overlap.
- Fold and Glue Edges: Fold the fabric edges under about 1/2 inch and secure with fabric glue or iron-on tape. This creates clean hems.
- Form the Envelope: Place the fabric right side down. Fold one end over about one-third of the way, then the other end over it, creating an overlapping back.
- Secure the Sides: Apply glue or tape along the side edges to seal them, leaving the overlapping back open for inserting the pillow.
- Insert Pillow and Finish: Once dry, turn the cover right side out and insert the pillow. The overlapping back will keep it in place.
Advantages and Disadvantages
Advantages:
- Budget-friendly (fabric costs vary)
- No sewing machine needed
- Quick to make
- Easy to switch out seasonally
Disadvantages:
- Less durable than sewn covers
- Glue may wash out
- May not fit as snugly as tailored covers
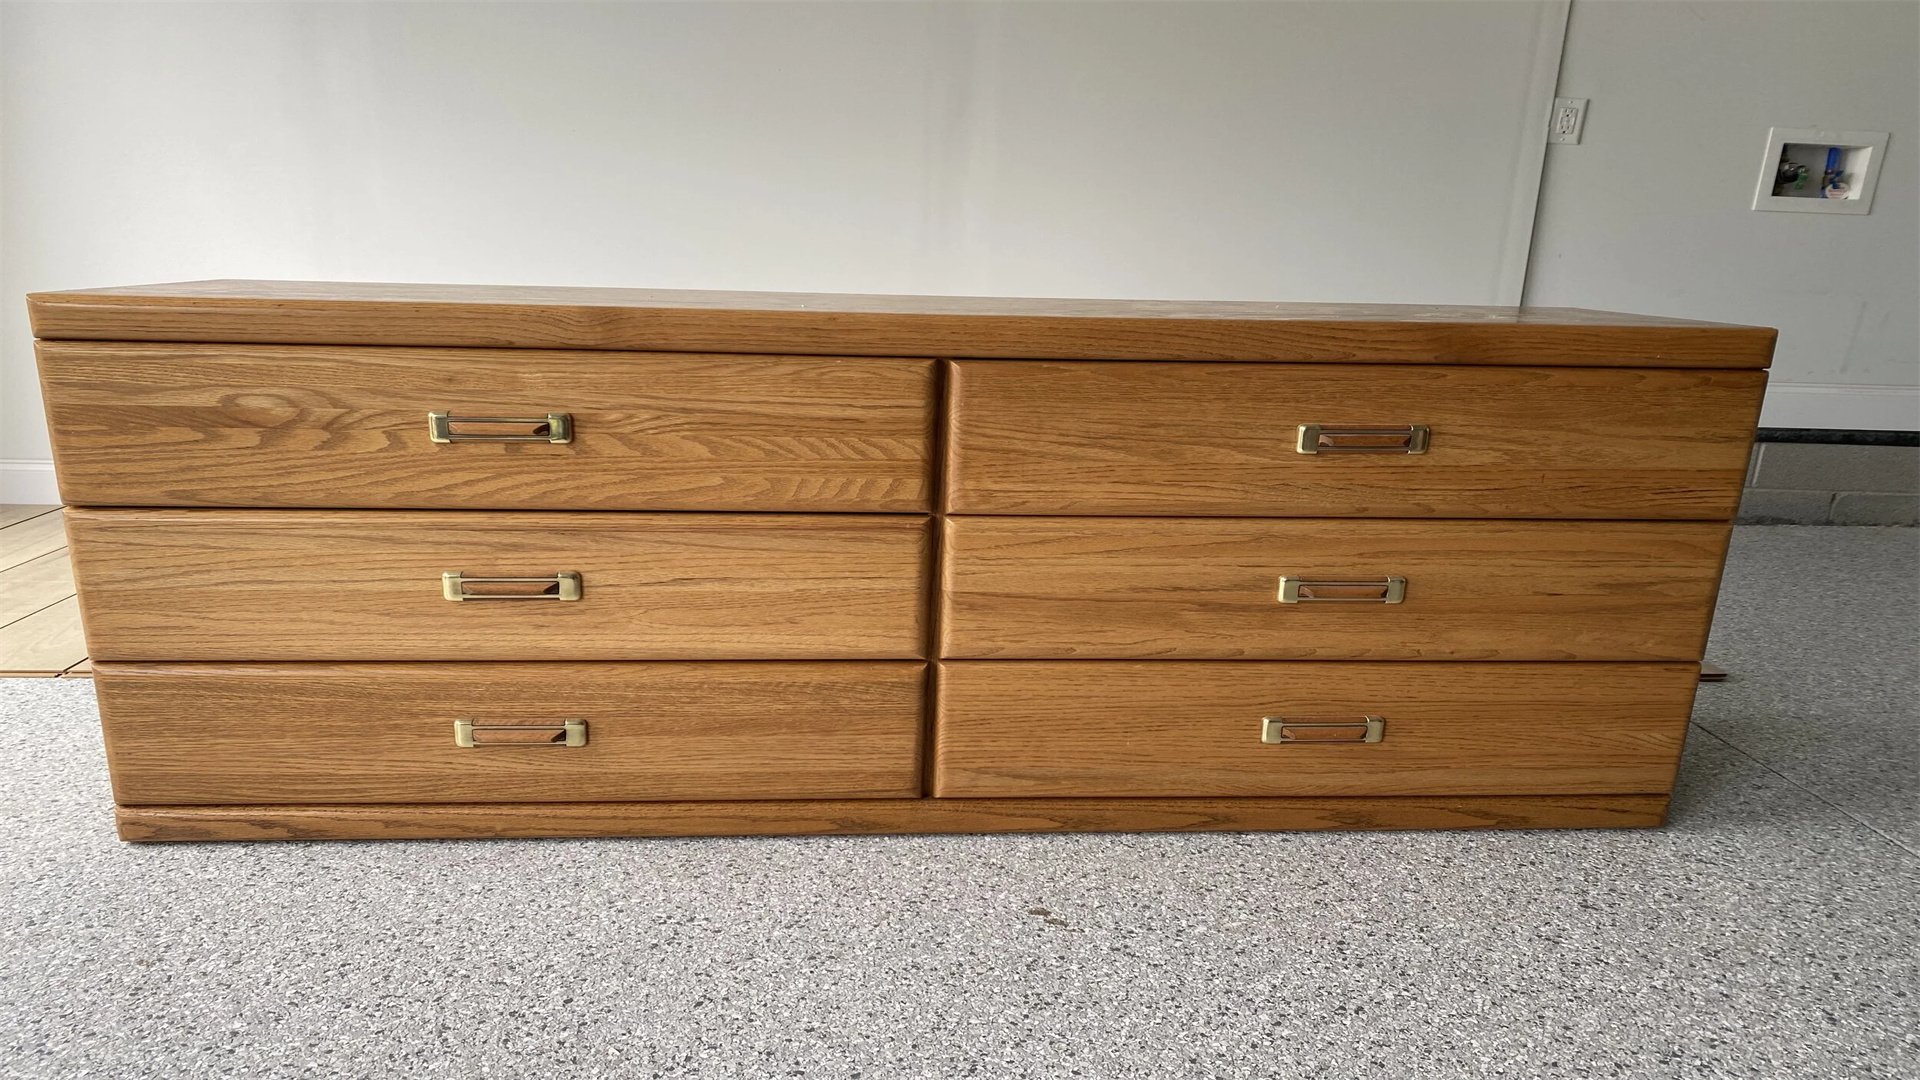
🗄️ Project 15: DIY Upcycled Dresser with New Hardware
Overview
Upcycling a dresser involves sanding, painting, and adding new knobs or pulls. It's a sustainable way to customize furniture to your taste.
Materials Needed
- Old dresser (thrifted or from garage sales)
- Sandpaper or electric sander
- Paint and primer (chalk paint works well for no-sand options)
- New hardware (knobs, handles)
- Screwdriver, brushes, and drop cloths
Step-by-Step Implementation
- Disassemble and Clean: Remove drawers and hardware. Clean the dresser with a damp cloth to remove dirt.
- Sand and Prime: Sand all surfaces to rough up the finish for better paint adhesion. Wipe away dust. Apply primer if needed.
- Paint the Dresser: Use a brush or roller to apply paint in thin, even coats. Allow drying between coats. Paint drawers separately.
- Attach New Hardware: Once paint is dry, measure and drill new holes if necessary for the hardware. Screw in new knobs or pulls.
- Reassemble and Style: Put the drawers back in. Consider adding felt pads to the bottom to protect floors. Style with decor items on top.
Advantages and Disadvantages
Advantages:
- Cost-effective (hardware is cheap, dresser can be found for low cost)
- Reduces waste
- Customizable color and style
- Increases furniture longevity
Disadvantages:
- Time-consuming due to drying times
- Requires space for painting
- Old dressers may have structural issues
Refreshing your home on a budget is entirely achievable with these 15 DIY projects. Each idea is designed to be completed over a weekend, using affordable materials and simple techniques. From kitchen upgrades like peel-and-stick backsplashes to decorative touches like painted pots and gallery walls, these projects offer practical ways to enhance your living space without overspending. Remember, the key to successful DIY is planning, patience, and personalization. By tackling these projects, you not only save money but also gain the satisfaction of creating something unique for your home. So, pick a project that inspires you, gather your supplies, and start transforming your home this weekend!
Advertisement